Recherche avancée
Médias (91)
-

Corona Radiata
26 septembre 2011, par
Mis à jour : Septembre 2011
Langue : English
Type : Audio
-

Lights in the Sky
26 septembre 2011, par
Mis à jour : Septembre 2011
Langue : English
Type : Audio
-

Head Down
26 septembre 2011, par
Mis à jour : Septembre 2011
Langue : English
Type : Audio
-

Echoplex
26 septembre 2011, par
Mis à jour : Septembre 2011
Langue : English
Type : Audio
-

Discipline
26 septembre 2011, par
Mis à jour : Septembre 2011
Langue : English
Type : Audio
-

Letting You
26 septembre 2011, par
Mis à jour : Septembre 2011
Langue : English
Type : Audio
Autres articles (44)
-
Les vidéos
21 avril 2011, parComme les documents de type "audio", Mediaspip affiche dans la mesure du possible les vidéos grâce à la balise html5 .
Un des inconvénients de cette balise est qu’elle n’est pas reconnue correctement par certains navigateurs (Internet Explorer pour ne pas le nommer) et que chaque navigateur ne gère en natif que certains formats de vidéos.
Son avantage principal quant à lui est de bénéficier de la prise en charge native de vidéos dans les navigateur et donc de se passer de l’utilisation de Flash et (...) -
Websites made with MediaSPIP
2 mai 2011, parThis page lists some websites based on MediaSPIP.
-
Possibilité de déploiement en ferme
12 avril 2011, parMediaSPIP peut être installé comme une ferme, avec un seul "noyau" hébergé sur un serveur dédié et utilisé par une multitude de sites différents.
Cela permet, par exemple : de pouvoir partager les frais de mise en œuvre entre plusieurs projets / individus ; de pouvoir déployer rapidement une multitude de sites uniques ; d’éviter d’avoir à mettre l’ensemble des créations dans un fourre-tout numérique comme c’est le cas pour les grandes plate-formes tout public disséminées sur le (...)
Sur d’autres sites (4476)
-
How to get .mp4 videos from motion on a Raspberry Pi ?
3 novembre 2017, par MaartiI use motion on my laptop and it works perfectly in any format. But when I use it on my Raspberry Pi 3 (Raspbian Jessie) with the Raspberry Camera V2, the only formats that work are :
.aviand.swf.When I choose any other format, the output video is a "0 sec video" that is played and closed instantly.
I would like to have
.mp4or.oggoutput so I can read it easily with HTML5.Here is the motion codec documentation.
Here is my config file :
############################################################

# Daemon

############################################################


# Start in daemon (background) mode and release terminal (default: off)

daemon on


# File to store the process ID, also called pid file. (default: not defined)

process_id_file /var/run/motion/motion.pid


############################################################

# Basic Setup Mode

############################################################


# Start in Setup-Mode, daemon disabled. (default: off)

setup_mode off


# Use a file to save logs messages, if not defined stderr and syslog is used. (default: not defined)

#logfile /mnt/camshare/Cam1/motion.log

logfile /tmp/motion.log


# Level of log messages [1..9] (EMR, ALR, CRT, ERR, WRN, NTC, INF, DBG, ALL). (default: 6 / NTC)

log_level 2


# Filter to log messages by type (COR, STR, ENC, NET, DBL, EVT, TRK, VID, ALL). (default: ALL)

log_type all


###########################################################

# Capture device options

############################################################


# Videodevice to be used for capturing  (default /dev/video0)

# for FreeBSD default is /dev/bktr0

#videodevice /dev/video0


# v4l2_palette allows to choose preferable palette to be use by motion

# to capture from those supported by your videodevice. (default: 17)

# E.g. if your videodevice supports both V4L2_PIX_FMT_SBGGR8 and

# V4L2_PIX_FMT_MJPEG then motion will by default use V4L2_PIX_FMT_MJPEG.

# Setting v4l2_palette to 2 forces motion to use V4L2_PIX_FMT_SBGGR8

# instead.

#

# Values :

# V4L2_PIX_FMT_SN9C10X : 0  'S910'

# V4L2_PIX_FMT_SBGGR16 : 1  'BYR2'

# V4L2_PIX_FMT_SBGGR8  : 2  'BA81'

# V4L2_PIX_FMT_SPCA561 : 3  'S561'

# V4L2_PIX_FMT_SGBRG8  : 4  'GBRG'

# V4L2_PIX_FMT_SGRBG8  : 5  'GRBG'

# V4L2_PIX_FMT_PAC207  : 6  'P207'

# V4L2_PIX_FMT_PJPG    : 7  'PJPG'

# V4L2_PIX_FMT_MJPEG   : 8  'MJPEG'

# V4L2_PIX_FMT_JPEG    : 9  'JPEG'

# V4L2_PIX_FMT_RGB24   : 10 'RGB3'

# V4L2_PIX_FMT_SPCA501 : 11 'S501'

# V4L2_PIX_FMT_SPCA505 : 12 'S505'

# V4L2_PIX_FMT_SPCA508 : 13 'S508'

# V4L2_PIX_FMT_UYVY    : 14 'UYVY'

# V4L2_PIX_FMT_YUYV    : 15 'YUYV'

# V4L2_PIX_FMT_YUV422P : 16 '422P'

# V4L2_PIX_FMT_YUV420  : 17 'YU12'

#

v4l2_palette 7


# Tuner device to be used for capturing using tuner as source (default /dev/tuner0)

# This is ONLY used for FreeBSD. Leave it commented out for Linux

; tunerdevice /dev/tuner0


# The video input to be used (default: -1)

# Should normally be set to 0 or 1 for video/TV cards, and -1 for USB cameras

input -1


# The video norm to use (only for video capture and TV tuner cards)

# Values: 0 (PAL), 1 (NTSC), 2 (SECAM), 3 (PAL NC no colour). Default: 0 (PAL)

norm 0


# The frequency to set the tuner to (kHz) (only for TV tuner cards) (default: 0)

frequency 0


# Rotate image this number of degrees. The rotation affects all saved images as

# well as movies. Valid values: 0 (default = no rotation), 90, 180 and 270.

rotate 0


# Image width (pixels). Valid range: Camera dependent, default: 352

#width 1024

width 640


# Image height (pixels). Valid range: Camera dependent, default: 288

#height 576

height 480


# Maximum number of frames to be captured per second.

# Valid range: 2-100. Default: 100 (almost no limit).

framerate 15


# Minimum time in seconds between capturing picture frames from the camera.

# Default: 0 = disabled - the capture rate is given by the camera framerate.

# This option is used when you want to capture images at a rate lower than 2 per second.

minimum_frame_time 0


# URL to use if you are using a network camera, size will be autodetected (incl http:// ftp:// mjpg:// or file:///)

# Must be a URL that returns single jpeg pictures or a raw mjpeg stream. Default: Not defined

;netcam_url http://127.0.0.1/cgi-bin/raspicam.sh


# Username and password for network camera (only if required). Default: not defined

# Syntax is user:password

; netcam_userpass value


# The setting for keep-alive of network socket, should improve performance on compatible net cameras.

# off:   The historical implementation using HTTP/1.0, closing the socket after each http request.

# force: Use HTTP/1.0 requests with keep alive header to reuse the same connection.

# on:    Use HTTP/1.1 requests that support keep alive as default.

# Default: off

netcam_keepalive off


# URL to use for a netcam proxy server, if required, e.g. "http://myproxy".

# If a port number other than 80 is needed, use "http://myproxy:1234".

# Default: not defined

; netcam_proxy value


# Set less strict jpeg checks for network cameras with a poor/buggy firmware.

# Default: off

netcam_tolerant_check off


# Let motion regulate the brightness of a video device (default: off).

# The auto_brightness feature uses the brightness option as its target value.

# If brightness is zero auto_brightness will adjust to average brightness value 128.

# Only recommended for cameras without auto brightness

auto_brightness off


# Set the initial brightness of a video device.

# If auto_brightness is enabled, this value defines the average brightness level

# which Motion will try and adjust to.

# Valid range 0-255, default 0 = disabled

brightness 0


# Set the contrast of a video device.

# Valid range 0-255, default 0 = disabled

contrast 0


# Set the saturation of a video device.

# Valid range 0-255, default 0 = disabled

saturation 0


# Set the hue of a video device (NTSC feature).

# Valid range 0-255, default 0 = disabled

hue 0


############################################################

# File "camera" support - read raw YUV data from a file

############################################################

#filecam_path /home/pi/test-cap/motion-mmal.capture


############################################################

# OpenMax/MMAL camera support for Raspberry Pi

############################################################

mmalcam_name vc.ril.camera

#mmalcam_control_params

#mmalcam_raw_capture_file /home/pi/motion-mmal.capture


# Switch this setting to "on" to use the still image mode of the Pi's camera

# instead of video. This gives a wider field of view, but requires

# a much slower frame-rate to achieve exposure stability

# (e.g. 0.25 fps or slower). You can use the minimum_frame_time

# parameter above to achieve this


mmalcam_use_still off


############################################################

# Round Robin (multiple inputs on same video device name)

############################################################


# Number of frames to capture in each roundrobin step (default: 1)

roundrobin_frames 1


# Number of frames to skip before each roundrobin step (default: 1)

roundrobin_skip 1


# Try to filter out noise generated by roundrobin (default: off)

switchfilter off


############################################################

# Motion Detection Settings:

############################################################


# Threshold for number of changed pixels in an image that

# triggers motion detection (default: 1500)

threshold 1500


# Automatically tune the threshold down if possible (default: off)

threshold_tune off


# Noise threshold for the motion detection (default: 32)

noise_level 32


# Automatically tune the noise threshold (default: on)

noise_tune on


# Despeckle motion image using (e)rode or (d)ilate or (l)abel (Default: not defined)

# Recommended value is EedDl. Any combination (and number of) of E, e, d, and D is valid.

# (l)abeling must only be used once and the 'l' must be the last letter.

# Comment out to disable

despeckle_filter EedDl


# Detect motion in predefined areas (1 - 9). Areas are numbered like that:  1 2 3

# A script (on_area_detected) is started immediately when motion is         4 5 6

# detected in one of the given areas, but only once during an event.        7 8 9

# One or more areas can be specified with this option. Take care: This option

# does NOT restrict detection to these areas! (Default: not defined)

; area_detect value


# PGM file to use as a sensitivity mask.

# Full path name to. (Default: not defined)

; mask_file value


# Dynamically create a mask file during operation (default: 0)

# Adjust speed of mask changes from 0 (off) to 10 (fast)

smart_mask_speed 0


# Ignore sudden massive light intensity changes given as a percentage of the picture

# area that changed intensity. Valid range: 0 - 100 , default: 0 = disabled

lightswitch 0


# Picture frames must contain motion at least the specified number of frames

# in a row before they are detected as true motion. At the default of 1, all

# motion is detected. Valid range: 1 to thousands, recommended 1-5

minimum_motion_frames 1


# Specifies the number of pre-captured (buffered) pictures from before motion

# was detected that will be output at motion detection.

# Recommended range: 0 to 5 (default: 0)

# Do not use large values! Large values will cause Motion to skip video frames and

# cause unsmooth movies. To smooth movies use larger values of post_capture instead.

pre_capture 2


# Number of frames to capture after motion is no longer detected (default: 0)

post_capture 2


# Event Gap is the seconds of no motion detection that triggers the end of an event.

# An event is defined as a series of motion images taken within a short timeframe.

# Recommended value is 60 seconds (Default). The value -1 is allowed and disables

# events causing all Motion to be written to one single movie file and no pre_capture.

# If set to 0, motion is running in gapless mode. Movies don't have gaps anymore. An

# event ends right after no more motion is detected and post_capture is over.

event_gap 60


# Maximum length in seconds of an mpeg movie

# When value is exceeded a new movie file is created. (Default: 0 = infinite)

# ATTENTION: when you're not using the motion build from the tutorial, it might fail with error 'Unknown config option "max_mpeg_time"'

# the use this line instead:

# max_movie_time 60

max_movie_time 60


# Always save images even if there was no motion (default: off)

emulate_motion off


############################################################

# Image File Output

############################################################


# Output 'normal' pictures when motion is detected (default: on)

# Valid values: on, off, first, best, center

# When set to 'first', only the first picture of an event is saved.

# Picture with most motion of an event is saved when set to 'best'.

# Picture with motion nearest center of picture is saved when set to 'center'.

# Can be used as preview shot for the corresponding movie.

output_pictures best


# Output pictures with only the pixels moving object (ghost images) (default: off)

output_debug_pictures off


# The quality (in percent) to be used by the jpeg compression (default: 75)

quality 75


# Type of output images

# Valid values: jpeg, ppm (default: jpeg)

picture_type jpeg


############################################################

# FFMPEG related options

# Film (movies) file output, and deinterlacing of the video input

# The options movie_filename and timelapse_filename are also used

# by the ffmpeg feature

############################################################


# Use ffmpeg to encode movies in realtime (default: off)

ffmpeg_output_movies on


# Use ffmpeg to make movies with only the pixels moving

# object (ghost images) (default: off)

ffmpeg_output_debug_movies off


# Use ffmpeg to encode a timelapse movie

# Default value 0 = off - else save frame every Nth second

ffmpeg_timelapse 0


# The file rollover mode of the timelapse video

# Valid values: hourly, daily (default), weekly-sunday, weekly-monday, monthly, manual

ffmpeg_timelapse_mode daily


# Bitrate to be used by the ffmpeg encoder (default: 400000)

# This option is ignored if ffmpeg_variable_bitrate is not 0 (disabled)

ffmpeg_bps 500000


# Enables and defines variable bitrate for the ffmpeg encoder.

# ffmpeg_bps is ignored if variable bitrate is enabled.

# Valid values: 0 (default) = fixed bitrate defined by ffmpeg_bps,

# or the range 2 - 31 where 2 means best quality and 31 is worst.

ffmpeg_variable_bitrate 5


# Codec to used by ffmpeg for the video compression.

# Timelapse mpegs are always made in mpeg1 format independent from this option.

# Supported formats are: mpeg1 (ffmpeg-0.4.8 only), mpeg4 (default), and msmpeg4.

# mpeg1 - gives you files with extension .mpg

# mpeg4 or msmpeg4 - gives you files with extension .avi

# msmpeg4 is recommended for use with Windows Media Player because

# it requires no installation of codec on the Windows client.

# swf - gives you a flash film with extension .swf

# flv - gives you a flash video with extension .flv

# ffv1 - FF video codec 1 for Lossless Encoding ( experimental )

# mov - QuickTime ( testing )

# ogg - Ogg/Theora ( testing )

#ffmpeg_video_codec msmpeg4

ffmpeg_video_codec mp4


# Use ffmpeg to deinterlace video. Necessary if you use an analog camera

# and see horizontal combing on moving objects in video or pictures.

# (default: off)

ffmpeg_deinterlace off


############################################################

# SDL Window

############################################################


# Number of motion thread to show in SDL Window (default: 0 = disabled)

#sdl_threadnr 0


############################################################

# External pipe to video encoder

# Replacement for FFMPEG builtin encoder for ffmpeg_output_movies only.

# The options movie_filename and timelapse_filename are also used

# by the ffmpeg feature

#############################################################


# Bool to enable or disable extpipe (default: off)

use_extpipe off


# External program (full path and opts) to pipe raw video to

# Generally, use '-' for STDIN...

;extpipe mencoder -demuxer rawvideo -rawvideo w=320:h=240:i420 -ovc x264 -x264encopts bframes=4:frameref=1:subq=1:scenecut=-1:nob_adapt:threads=1:keyint=1000:8x8dct:vbv_bufsize=4000:crf=24:partitions=i8x8,i4x4:vbv_maxrate=800:no-chroma-me -vf denoise3d=16:12:48:4,pp=lb -of   avi -o %f.avi - -fps %fps


############################################################

# Snapshots (Traditional Periodic Webcam File Output)

############################################################


# Make automated snapshot every N seconds (default: 0 = disabled)

snapshot_interval 0


############################################################

# Text Display

# %Y = year, %m = month, %d = date,

# %H = hour, %M = minute, %S = second, %T = HH:MM:SS,

# %v = event, %q = frame number, %t = thread (camera) number,

# %D = changed pixels, %N = noise level, \n = new line,

# %i and %J = width and height of motion area,

# %K and %L = X and Y coordinates of motion center

# %C = value defined by text_event - do not use with text_event!

# You can put quotation marks around the text to allow

# leading spaces

############################################################


# Locate and draw a box around the moving object.

# Valid values: on, off, preview (default: off)

# Set to 'preview' will only draw a box in preview_shot pictures.

locate_motion_mode off


# Set the look and style of the locate box if enabled.

# Valid values: box, redbox, cross, redcross (default: box)

# Set to 'box' will draw the traditional box.

# Set to 'redbox' will draw a red box.

# Set to 'cross' will draw a little cross to mark center.

# Set to 'redcross' will draw a little red cross to mark center.

locate_motion_style box


# Draws the timestamp using same options as C function strftime(3)

# Default: %Y-%m-%d\n%T = date in ISO format and time in 24 hour clock

# Text is placed in lower right corner

text_right %d.%m.%Y\n%T


# Draw a user defined text on the images using same options as C function strftime(3)

# Default: Not defined = no text

# Text is placed in lower left corner

; text_left CAMERA %t

text_left HofCam


# Draw the number of changed pixed on the images (default: off)

# Will normally be set to off except when you setup and adjust the motion settings

# Text is placed in upper right corner

text_changes off


# This option defines the value of the special event conversion specifier %C

# You can use any conversion specifier in this option except %C. Date and time

# values are from the timestamp of the first image in the current event.

# Default: %Y%m%d%H%M%S

# The idea is that %C can be used filenames and text_left/right for creating

# a unique identifier for each event.

text_event %Y%m%d%H%M%S


# Draw characters at twice normal size on images. (default: off)

text_double on


# Text to include in a JPEG EXIF comment

# May be any text, including conversion specifiers.

# The EXIF timestamp is included independent of this text.

;exif_text %i%J/%K%L


############################################################

# Target Directories and filenames For Images And Films

# For the options snapshot_, picture_, movie_ and timelapse_filename

# you can use conversion specifiers

# %Y = year, %m = month, %d = date,

# %H = hour, %M = minute, %S = second,

# %v = event, %q = frame number, %t = thread (camera) number,

# %D = changed pixels, %N = noise level,

# %i and %J = width and height of motion area,

# %K and %L = X and Y coordinates of motion center

# %C = value defined by text_event

# Quotation marks round string are allowed.

############################################################


# Target base directory for pictures and films

# Recommended to use absolute path. (Default: current working directory)

target_dir /home/pi


# File path for snapshots (jpeg or ppm) relative to target_dir

# Default: %v-%Y%m%d%H%M%S-snapshot

# Default value is equivalent to legacy oldlayout option

# For Motion 3.0 compatible mode choose: %Y/%m/%d/%H/%M/%S-snapshot

# File extension .jpg or .ppm is automatically added so do not include this.

# Note: A symbolic link called lastsnap.jpg created in the target_dir will always

# point to the latest snapshot, unless snapshot_filename is exactly 'lastsnap'

snapshot_filename %v-%Y%m%d%H%M%S-snapshot


# File path for motion triggered images (jpeg or ppm) relative to target_dir

# Default: %v-%Y%m%d%H%M%S-%q

# Default value is equivalent to legacy oldlayout option

# For Motion 3.0 compatible mode choose: %Y/%m/%d/%H/%M/%S-%q

# File extension .jpg or .ppm is automatically added so do not include this

# Set to 'preview' together with best-preview feature enables special naming

# convention for preview shots. See motion guide for details

picture_filename %v-%Y%m%d%H%M%S-%q


# File path for motion triggered ffmpeg films (movies) relative to target_dir

# Default: %v-%Y%m%d%H%M%S

# Default value is equivalent to legacy oldlayout option

# For Motion 3.0 compatible mode choose: %Y/%m/%d/%H%M%S

# File extension .mpg or .avi is automatically added so do not include this

# This option was previously called ffmpeg_filename

movie_filename %v-%Y%m%d%H%M%S


# File path for timelapse movies relative to target_dir

# Default: %Y%m%d-timelapse

# Default value is near equivalent to legacy oldlayout option

# For Motion 3.0 compatible mode choose: %Y/%m/%d-timelapse

# File extension .mpg is automatically added so do not include this

timelapse_filename %Y%m%d-timelapse


############################################################

# Global Network Options

############################################################

# Enable or disable IPV6 for http control and stream (default: off )

ipv6_enabled off


############################################################

# Live Stream Server

############################################################


# The mini-http server listens to this port for requests (default: 0 = disabled)

stream_port 8080


# Quality of the jpeg (in percent) images produced (default: 50)

stream_quality 50


# Output frames at 1 fps when no motion is detected and increase to the

# rate given by stream_maxrate when motion is detected (default: off)

stream_motion on


# Maximum framerate for stream streams (default: 1)

stream_maxrate 4


# Restrict stream connections to localhost only (default: on)

stream_localhost off


# Limits the number of images per connection (default: 0 = unlimited)

# Number can be defined by multiplying actual stream rate by desired number of seconds

# Actual stream rate is the smallest of the numbers framerate and stream_maxrate

stream_limit 0


# Set the authentication method (default: 0)

# 0 = disabled

# 1 = Basic authentication

# 2 = MD5 digest (the safer authentication)

stream_auth_method 0


# Authentication for the stream. Syntax username:password

# Default: not defined (Disabled)

; stream_authentication username:password


############################################################

# HTTP Based Control

############################################################


# TCP/IP port for the http server to listen on (default: 0 = disabled)

webcontrol_port 8081


# Restrict control connections to localhost only (default: on)

webcontrol_localhost off


# Output for http server, select off to choose raw text plain (default: on)

webcontrol_html_output on


# Authentication for the http based control. Syntax username:password

# Default: not defined (Disabled)

; webcontrol_authentication username:password


############################################################

# Tracking (Pan/Tilt)

#############################################################


# Type of tracker (0=none (default), 1=stepper, 2=iomojo, 3=pwc, 4=generic, 5=uvcvideo, 6=servo)

# The generic type enables the definition of motion center and motion size to

# be used with the conversion specifiers for options like on_motion_detected

track_type 0


# Enable auto tracking (default: off)

track_auto off


# Serial port of motor (default: none)

;track_port /dev/ttyS0


# Motor number for x-axis (default: 0)

;track_motorx 0


# Set motorx reverse (default: 0)

;track_motorx_reverse 0


# Motor number for y-axis (default: 0)

;track_motory 1


# Set motory reverse (default: 0)

;track_motory_reverse 0


# Maximum value on x-axis (default: 0)

;track_maxx 200


# Minimum value on x-axis (default: 0)

;track_minx 50


# Maximum value on y-axis (default: 0)

;track_maxy 200


# Minimum value on y-axis (default: 0)

;track_miny 50


# Center value on x-axis (default: 0)

;track_homex 128


# Center value on y-axis (default: 0)

;track_homey 128


# ID of an iomojo camera if used (default: 0)

track_iomojo_id 0


# Angle in degrees the camera moves per step on the X-axis

# with auto-track (default: 10)

# Currently only used with pwc type cameras

track_step_angle_x 10


[...] -
My SBC Collection
31 décembre 2023, par Multimedia Mike — GeneralLike many computer nerds in the last decade, I have accumulated more than a few single-board computers, or “SBCs”, which are small computers based around a system-on-a-chip (SoC) that nearly always features an ARM CPU at its core. Surprisingly few of these units are Raspberry Pi units, though that brand has come to exemplify and dominate the product category.
Also, as is the case for many computer nerds, most of these SBCs lay fallow for years at a time. Equipped with an inexpensive lightbox that I procured in the last year, I decided I could at least create glamour shots of various units and catalog them in a blog post.
While Raspberry Pi still enjoys the most mindshare far and away, and while I do have a few Raspberry Pi units in my inventory, I have always been a bigger fan of the ODROID brand, which works with convenient importers around the world (in the USA, I can vouch for Ameridroid, to whom I’ve forked over a fair amount of cash for these computing toys).
As mentioned, Raspberry Pi undisputedly has the most mindshare of all these SBC brands and I often wonder why… and then I immediately remind myself that it has the biggest ecosystem, and has a variety of turnkey projects and applications (such as Pi-hole and PiVPN) that promise a lower barrier to entry — as well as a slightly lower price point — than some of these other options. ODROID had a decent ecosystem for awhile, especially considering the monthly ODROID Magazine, though that ceased publication in July 2020. The Raspberry Pi and its variants were famously difficult to come by due to the global chip shortage from 2021-2023. Meanwhile, I had no trouble procuring these boards during the same timeframe.
So let’s delve into the collection…
Cubieboard
The Raspberry Pi came out in 2012 and by 2013 I was somewhat coveting one to hack on. Finally ! An accessible ARM platform to play with. I had heard of the BeagleBoard for years but never tried to get my hands on one. I was thinking about taking the plunge on a new Raspberry Pi, but a colleague told me I should skip that and go with this new hotness called the Cubieboard, based on an Allwinner SoC. The big value-add that this board had vs. a Raspberry Pi was that it had a SATA adapter. Although now that it has been a decade, it only now occurs to me to quander whether it was true SATA or a USB-to-SATA bridge. Looking it up now, I’m led to believe that the SoC supported the functionality natively.Anyway, I did get it up and running but never did much with it, thus setting the tone for future SBC endeavors. No photos because I gave it to another tech enthusiast years ago, whose SBC collection dwarfs my own.
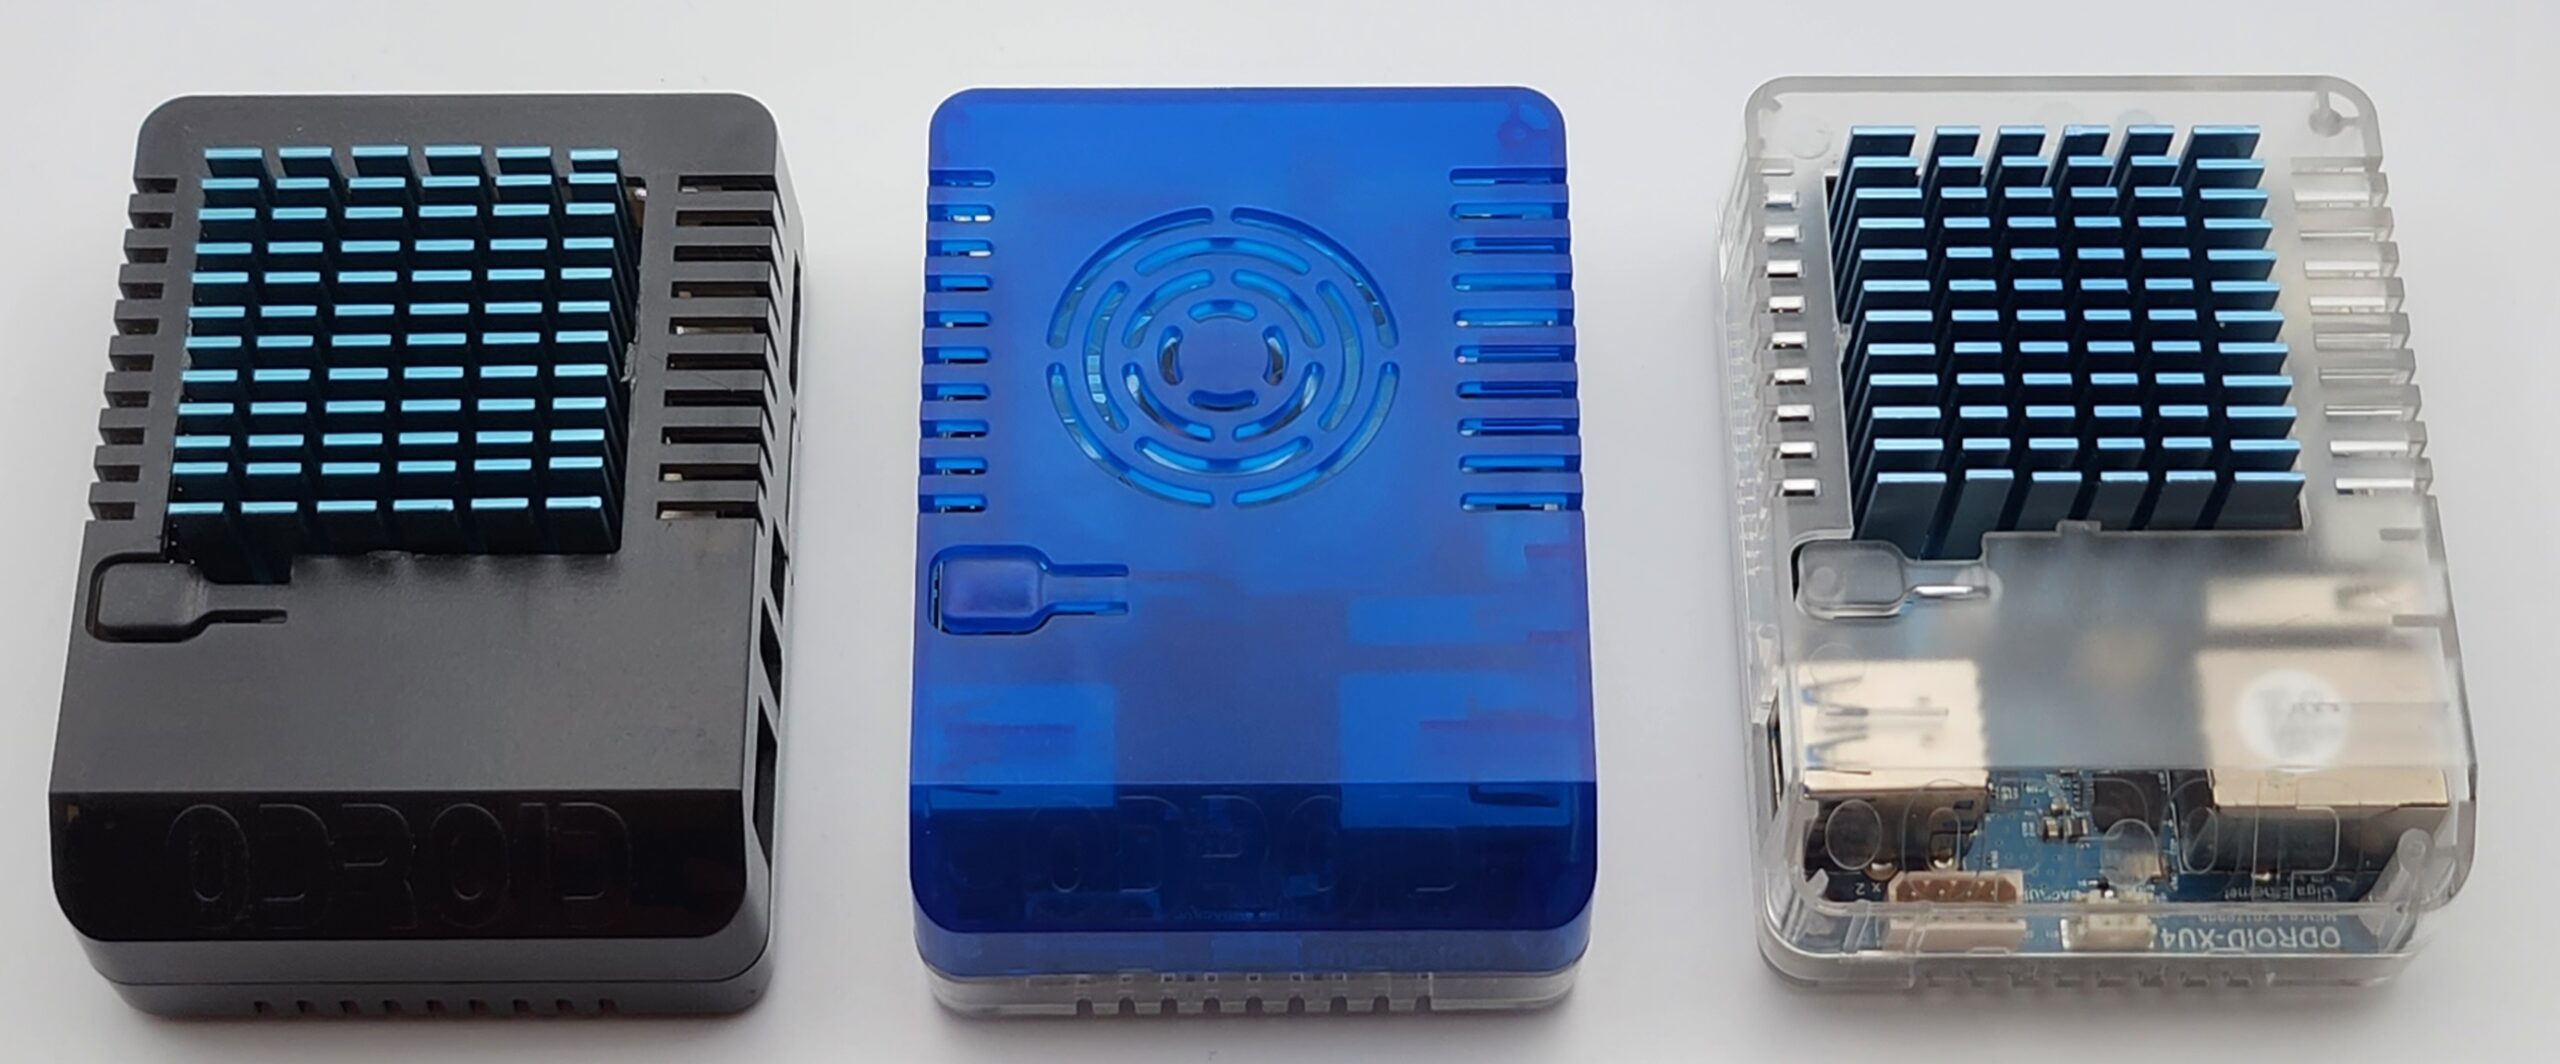
ODROID-XU4
I can’t recall exactly when or how I first encountered the ODROID brand. I probably read about it on some enthusiast page or another circa 2014 and decided to try one out. I eventually acquired a total of 3 of these ODROID-XU4 units, each with a different case, 1 with a fan and 2 passively-cooled :
Collection of ODROID-XU4 SBCs
This is based on the Samsung Exynos 5422 SoC, the same series as was used in their Note 3 phone released in 2013. It has been a fun chip to play with. The XU4 was also my first introduction to the eMMC storage solution that is commonly supported on the ODROID SBCs (alongside micro-SD). eMMC offers many benefits over SD in terms of read/write speed as well as well as longevity/write cycles. That’s getting less relevant these days, however, as more and more SBCs are being released with direct NVMe SSD support.
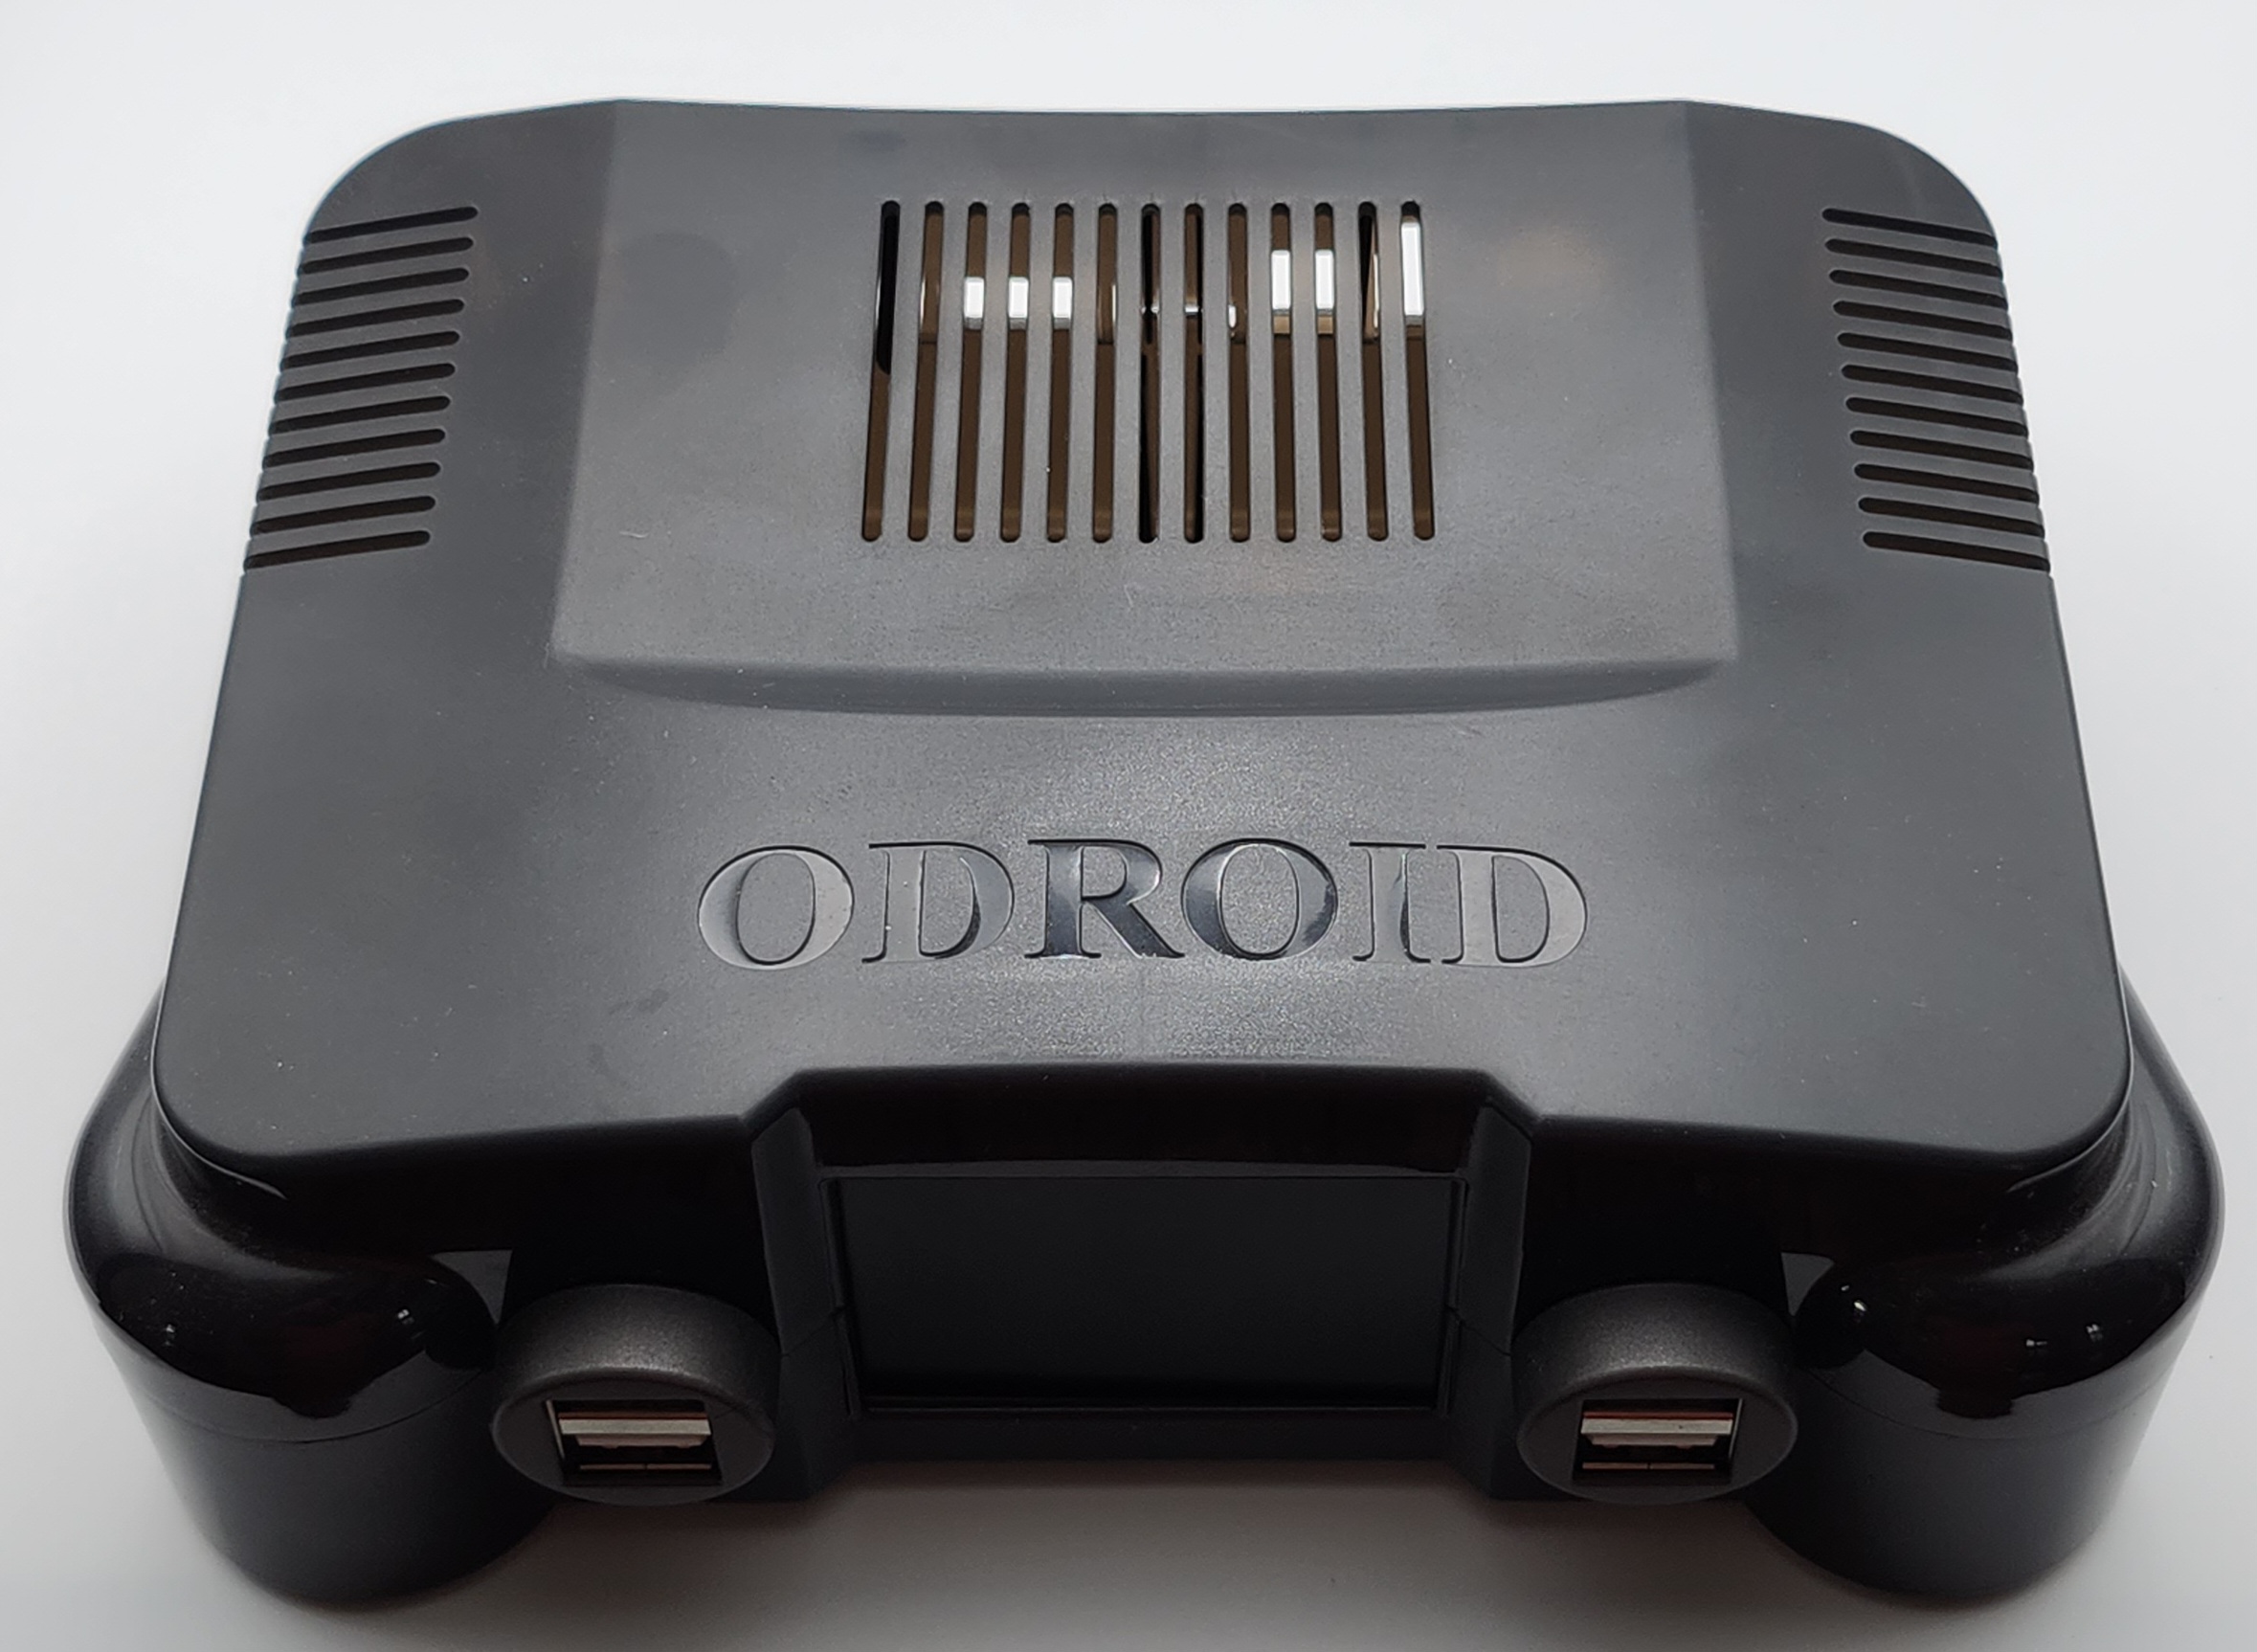
I had initially wanted to make a retro-gaming device built on this platform (see the handheld section later for more meditations on that). In support of this common hobbyist goal, there is this nifty case XU4 case which apes the aesthetic of the Nintendo N64 :

ODROID-XU4 N64-style case
It even has a cool programmable LCD screen. Maybe one day I’ll find a use for it.
For awhile, one of these XU4 units (likely the noisy, fan-cooled one) was contributing results to the FFmpeg FATE system.
While it features gigabit ethernet and a USB3 port, I once tried to see if I could get 2 Gbps throughput with the unit using a USB3-gigabit dongle. I had curious results in that the total amount of traffic throughput could never exceed 1 Gbps across both interfaces. I.e., if 1 interface was dealing with 1 Gbps and the other interface tried to run at 1 Gbps, they would both only run at 500 Mbps. That remains a mystery to me since I don’t see that limitation with Intel chips.
Still, the XU4 has been useful for a variety of projects and prototyping over the years.
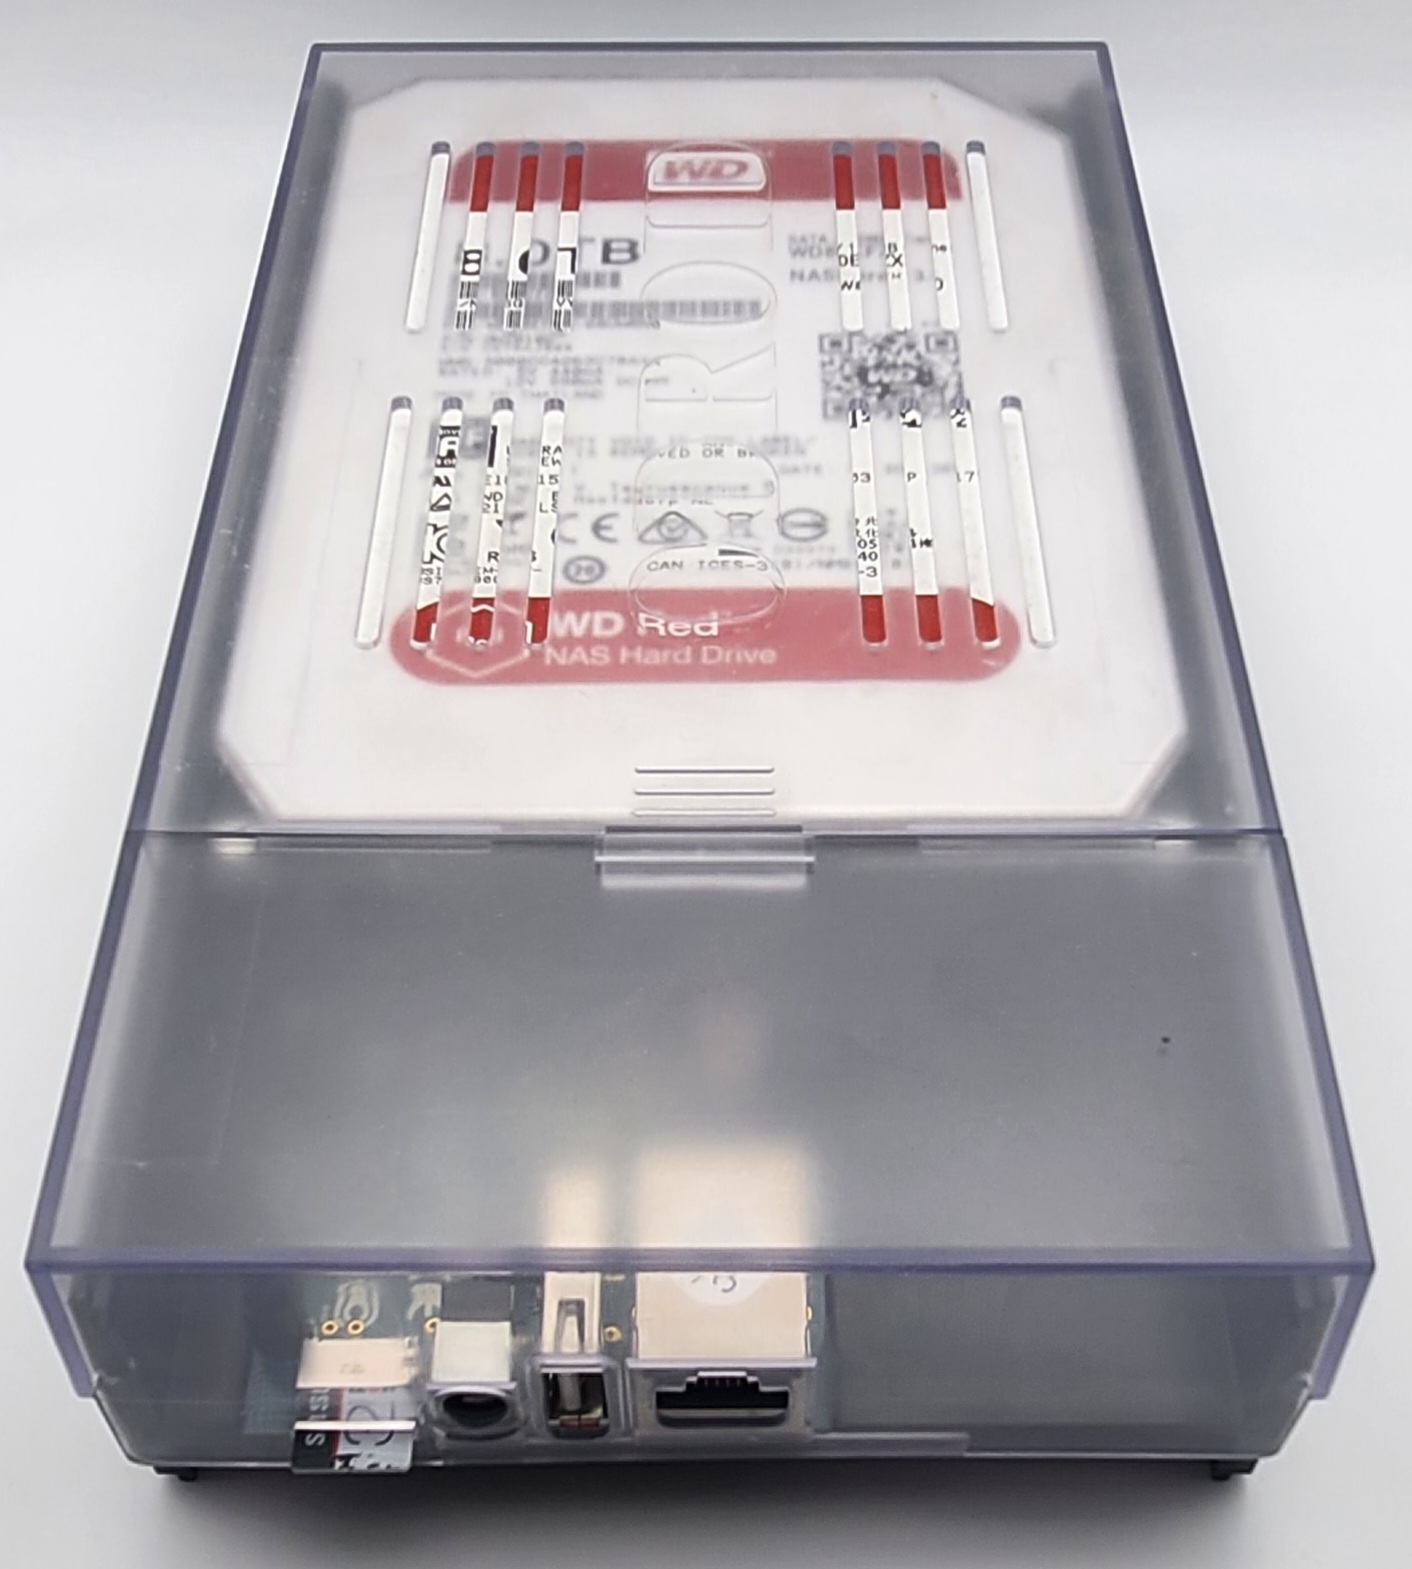
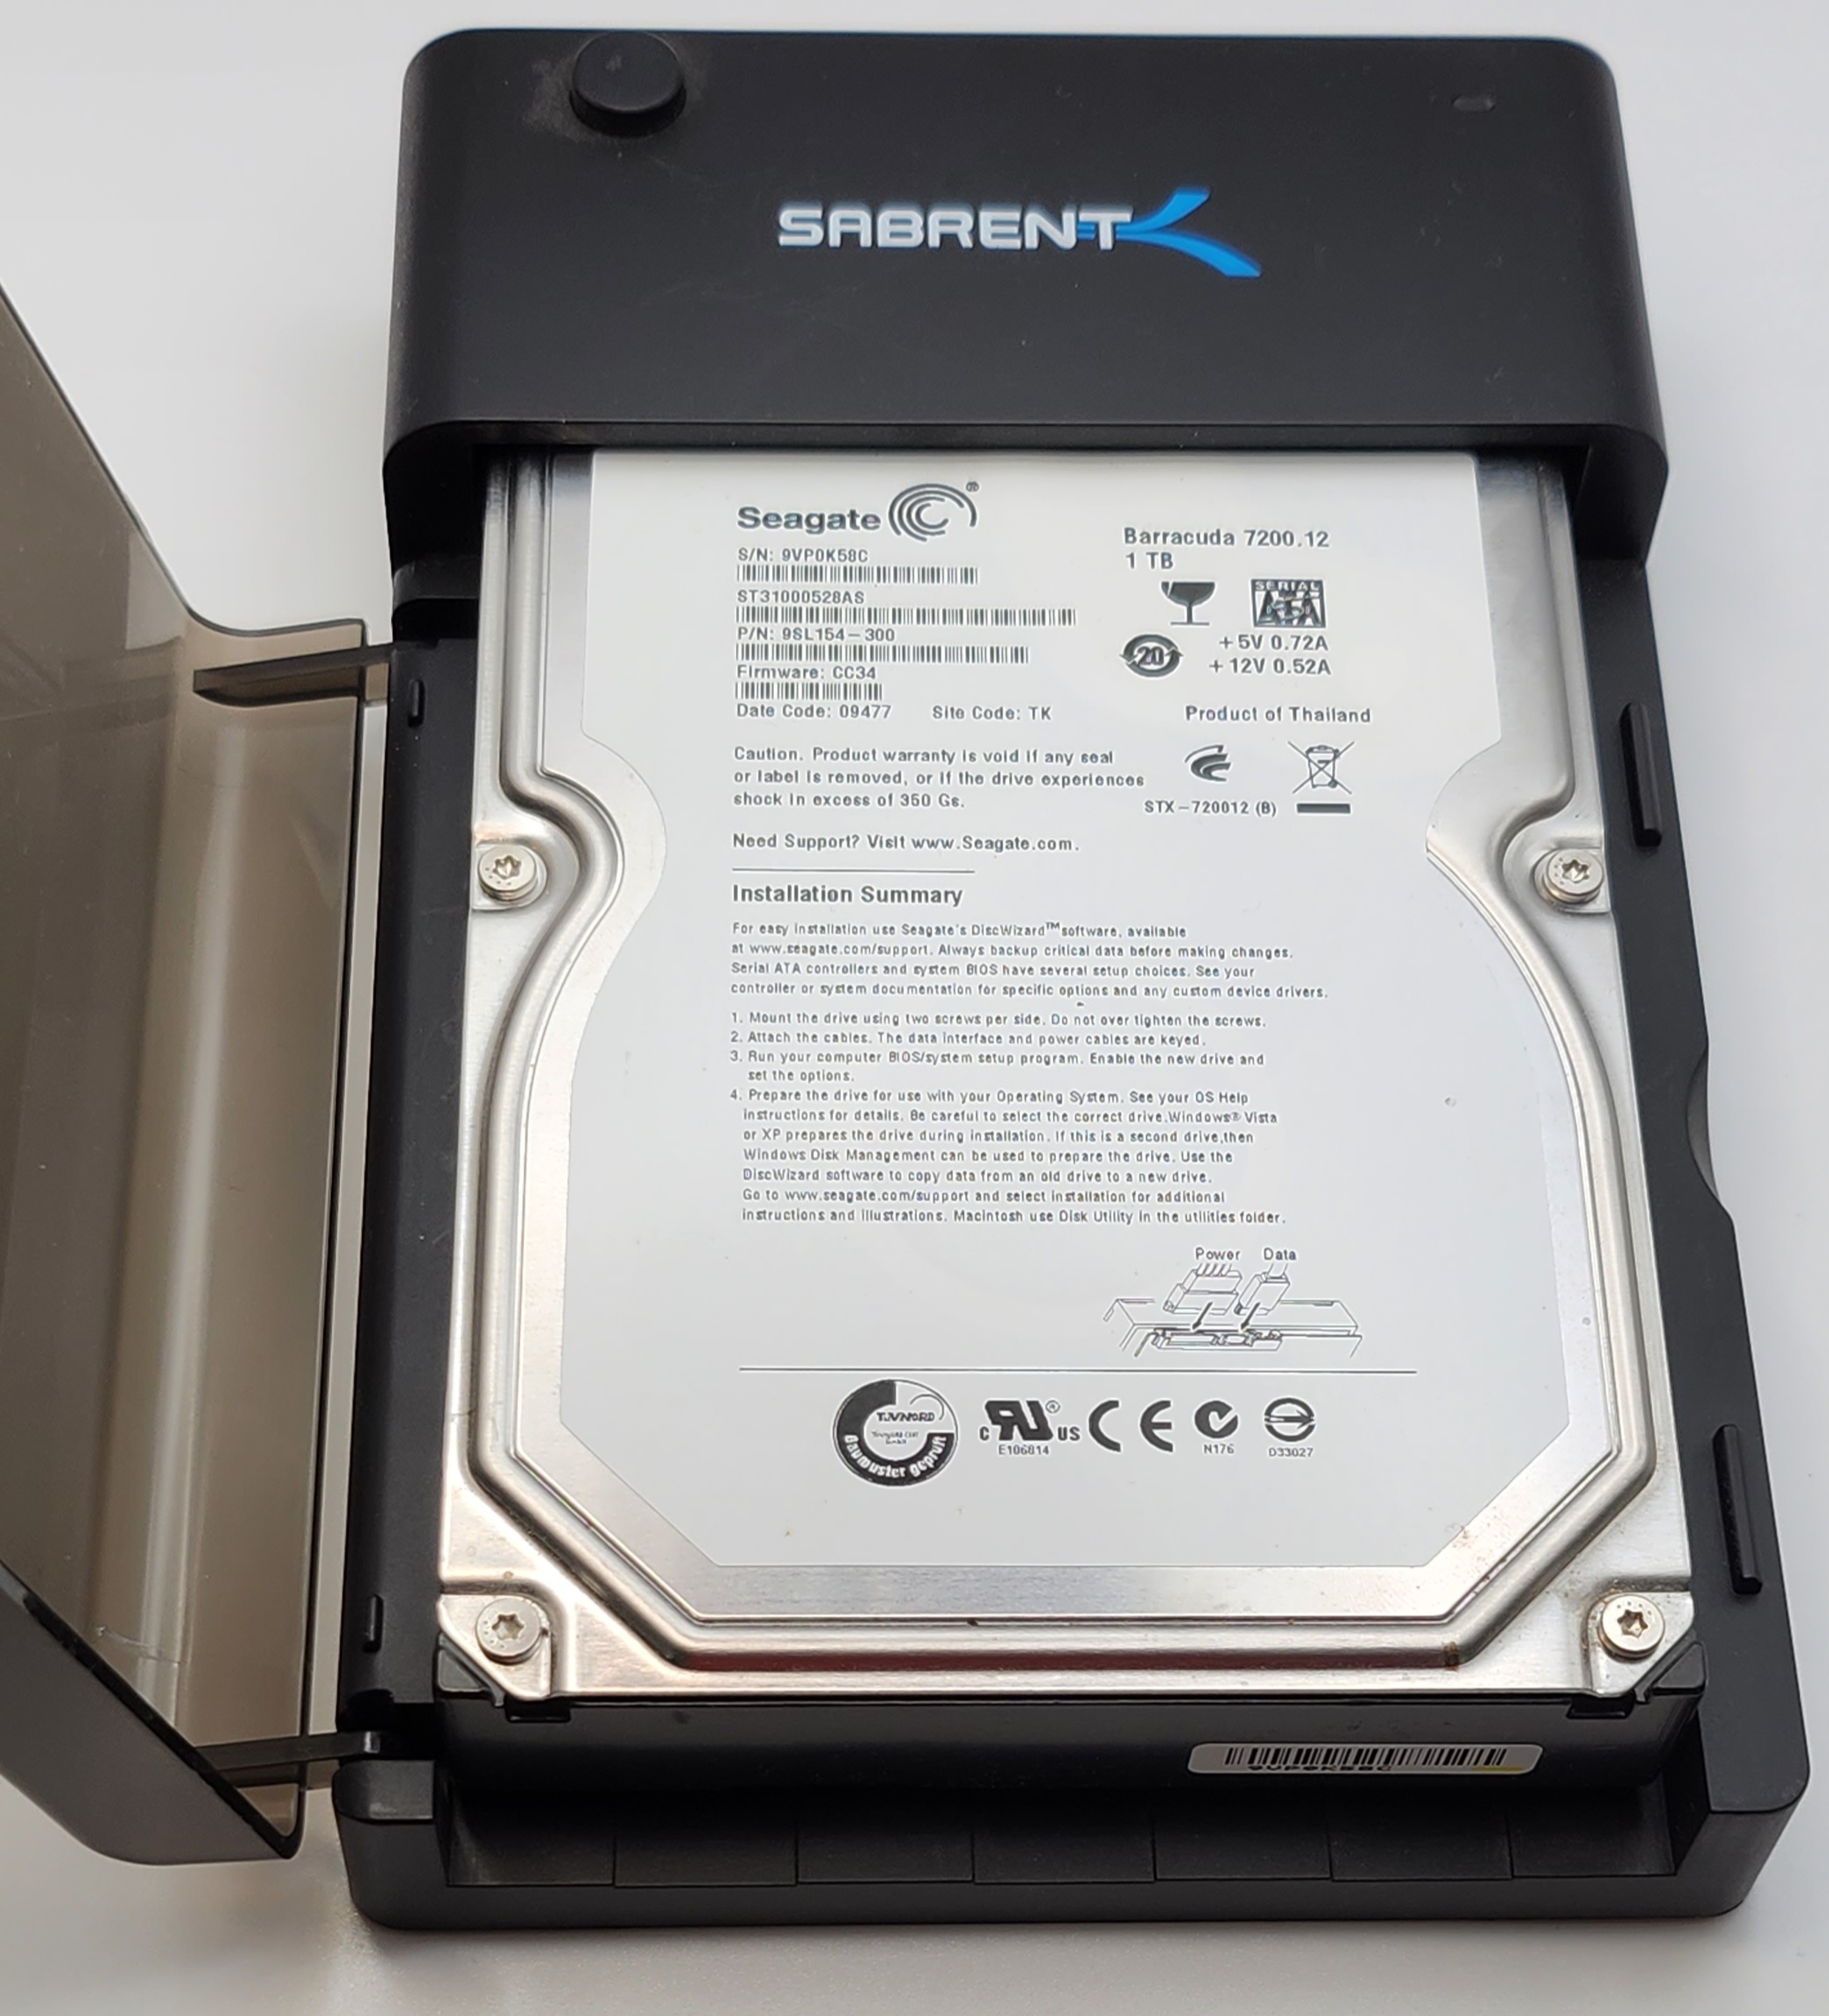
ODROID-HC2 NAS
I find that a lot of my fellow nerds massively overengineer their homelab NAS setups. I’ll explore this in a future post. For my part, people tend to find my homelab NAS solution slightly underengineered. This is the ODROID-HC2 (the “HC” stands for “Home Cloud”) :
ODROID-HC2 NAS
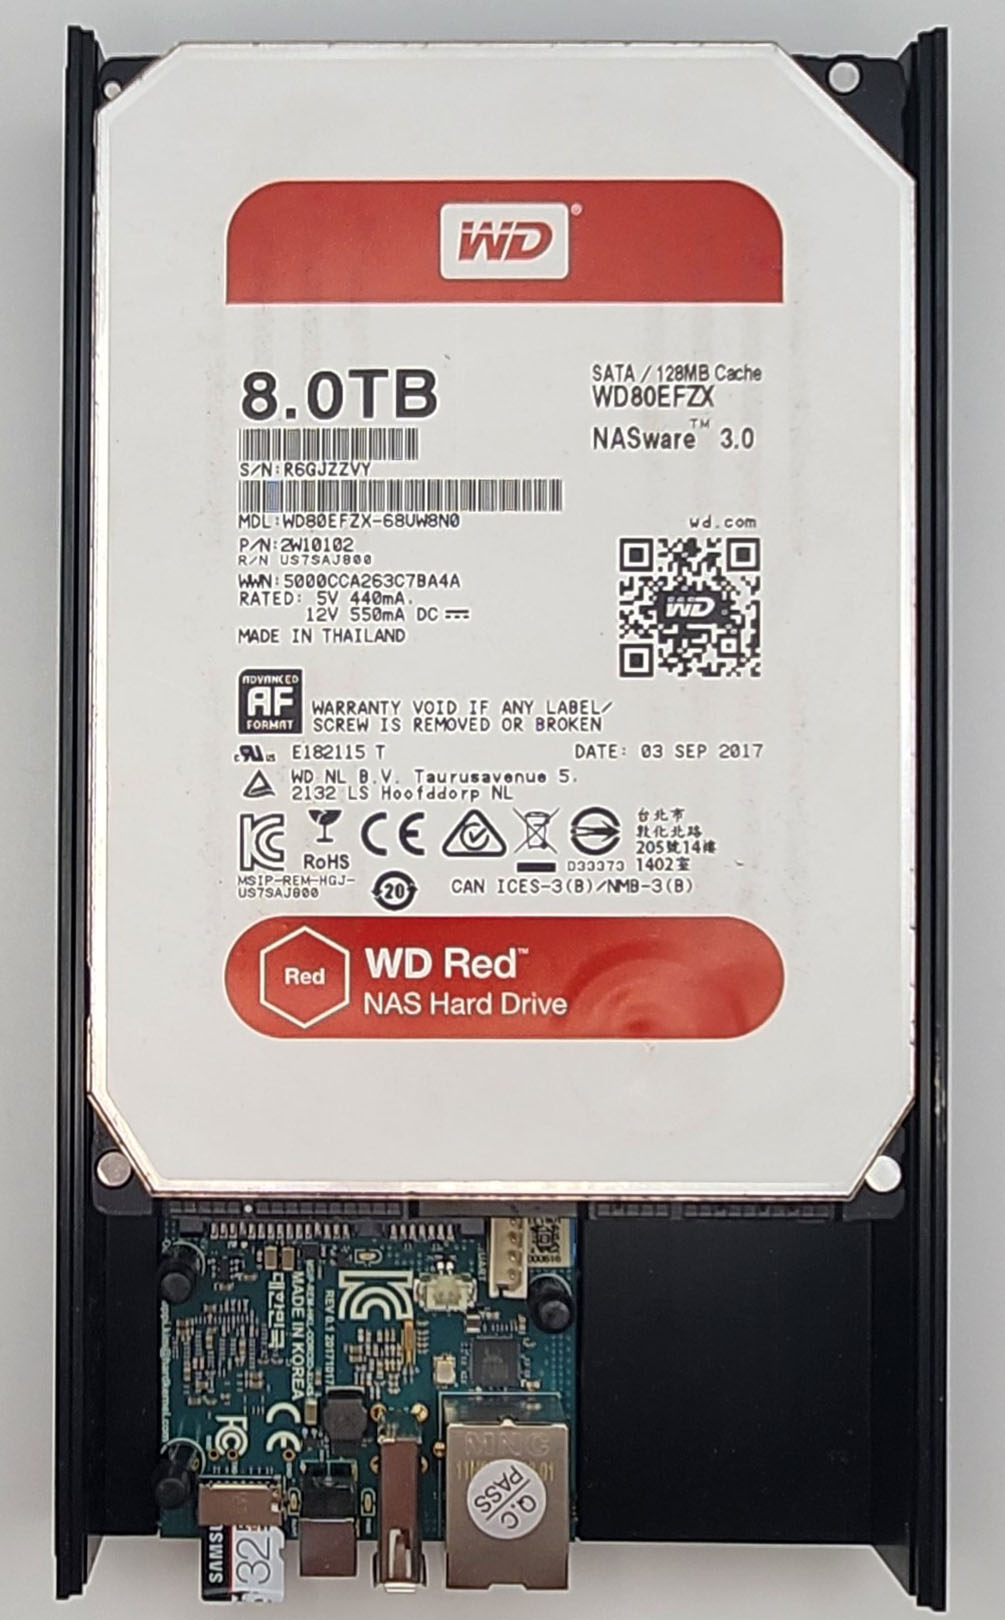
It has the same guts as the ODROID-XU4 except no video output and the USB3 function is leveraged for a SATA bridge. This allows you to plug a SATA hard drive directly into the unit :

ODROID-HC2 NAS uncovered
Believe it or not, this has been my home NAS solution for something like 6 or 7 years now– I don’t clearly remember when I purchased it and put it into service.
But isn’t this sort of irresponsible ? What about a failure of the main drive ? That’s why I have an external drive connected for backing up the most important data via rsync :

ODROID-HC2 NAS backup enclosure
The power consumption can’t be beat– Profiling for a few weeks of average usage worked out to 4.5 kWh for the ODROID-HC2… per month.
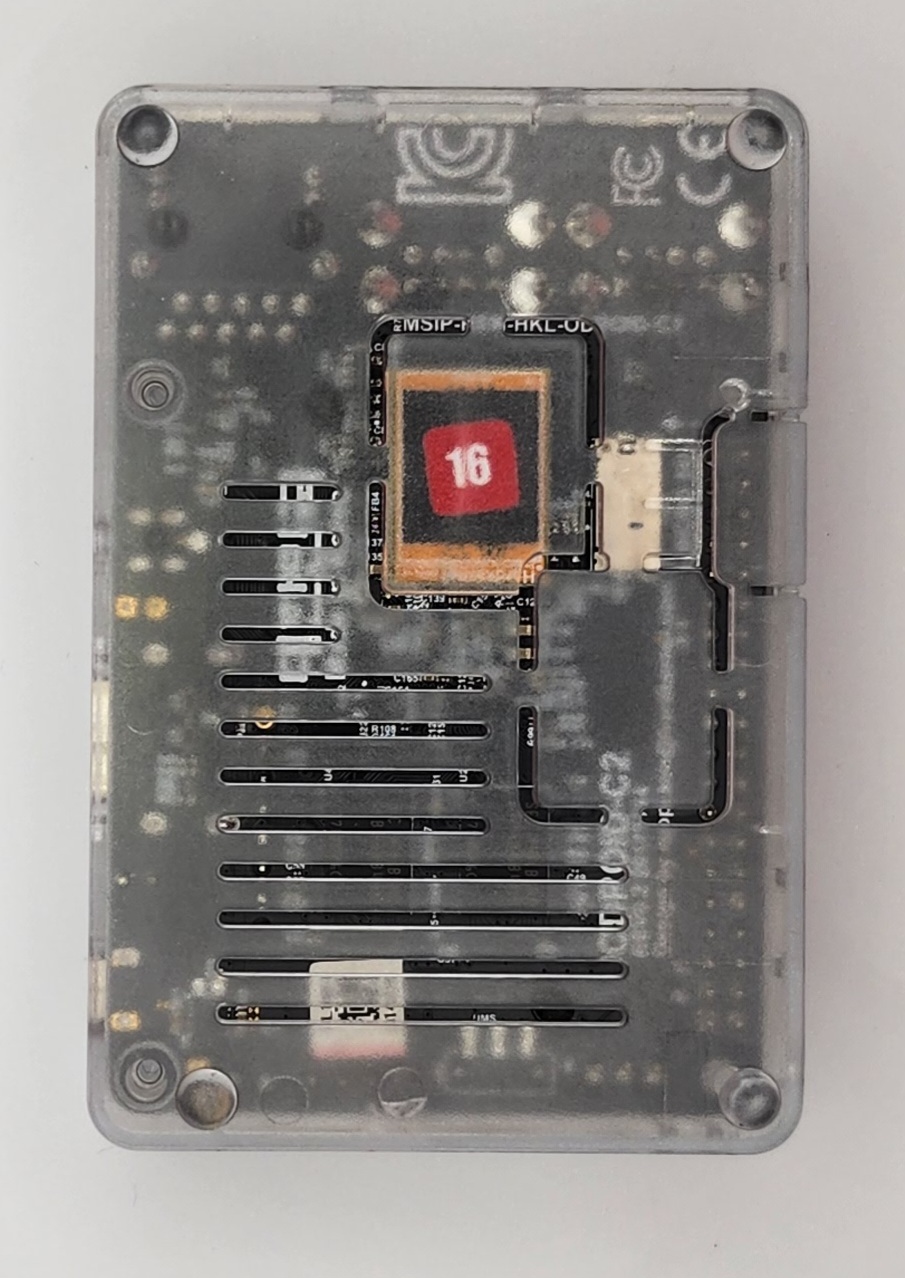
ODROID-C2
I was on a kick of ordering more SBCs at one point. This is the ODROID-C2, equipped with a 64-bit Amlogic SoC :
ODROID-C2
I had this on the FATE farm for awhile, performing 64-bit ARM builds (vs. the XU4’s 32-bit builds). As memory serves, it was unreliable and would occasionally freeze up.
Here is a view of the eMMC storage through the bottom of the translucent case :

Bottom of ODROID-C2 with view of eMMC storage
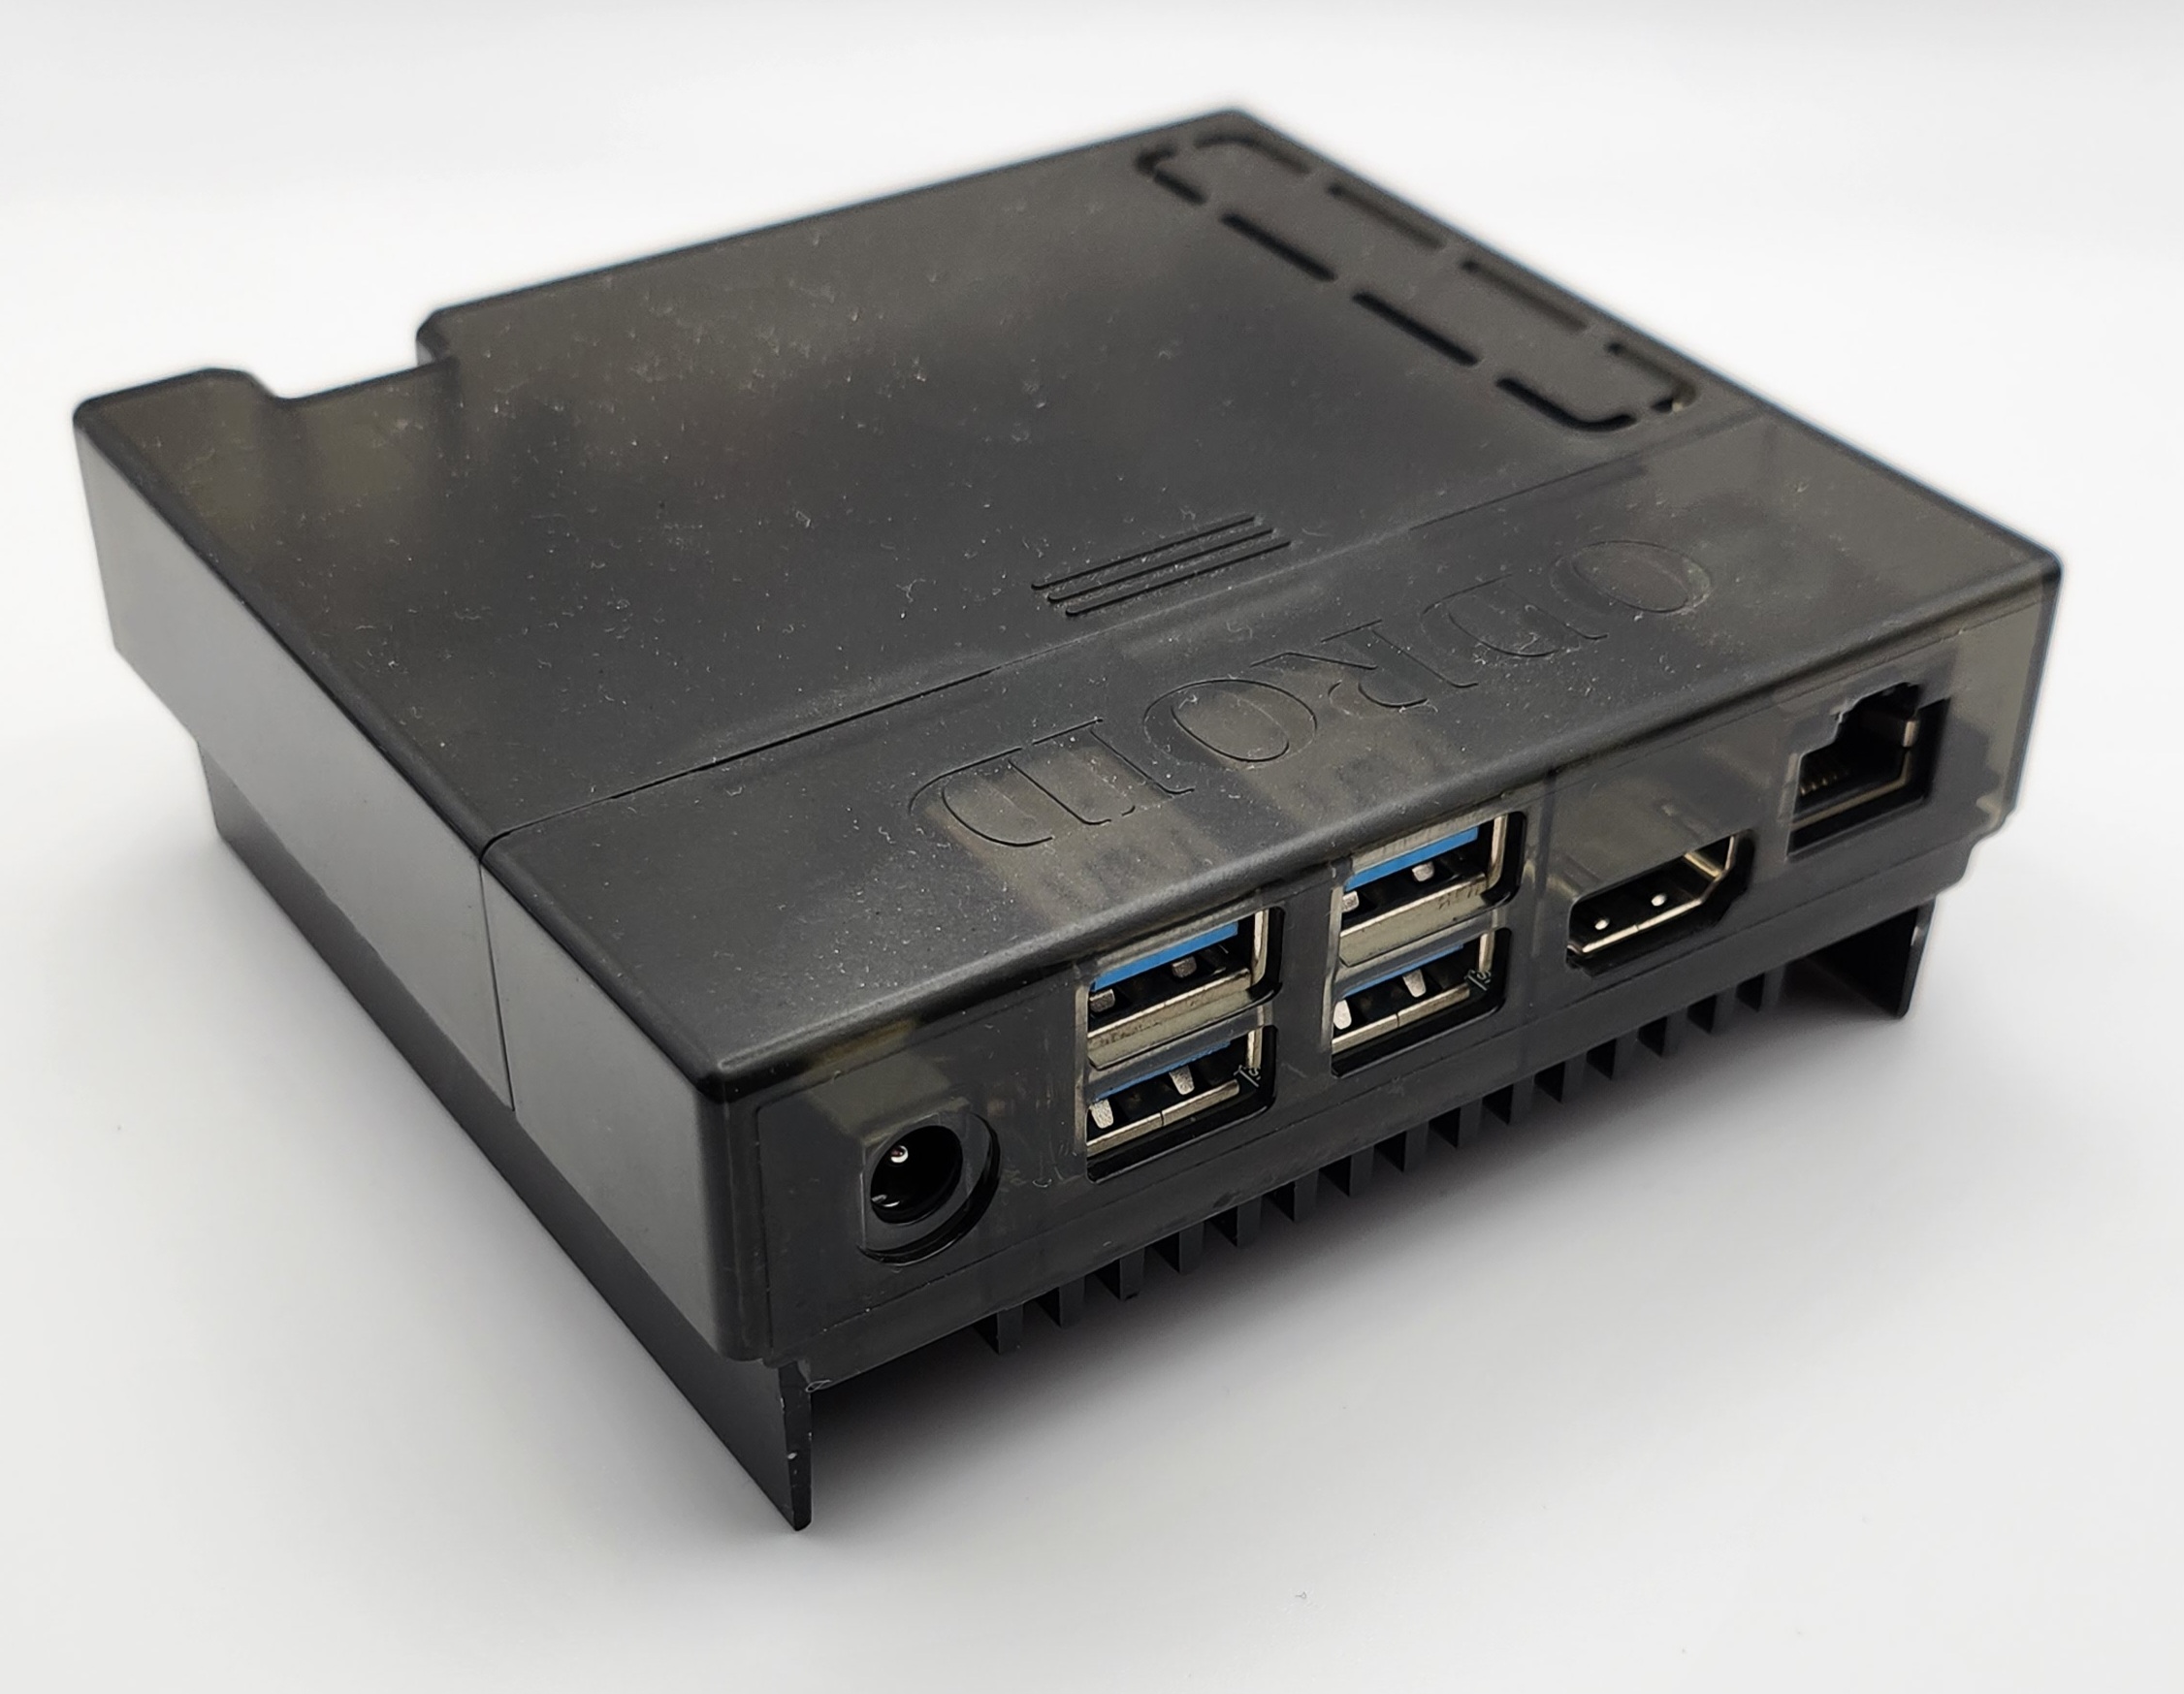
ODROID-N2+
Out of all my ODROID SBCs, this is the unit that I long to “get back to” the most– the ODROID-N2+ :
ODROID-N2+
Very capable unit that makes a great little desktop. I have some projects I want to develop using it so that it will force me to have a focused development environment.
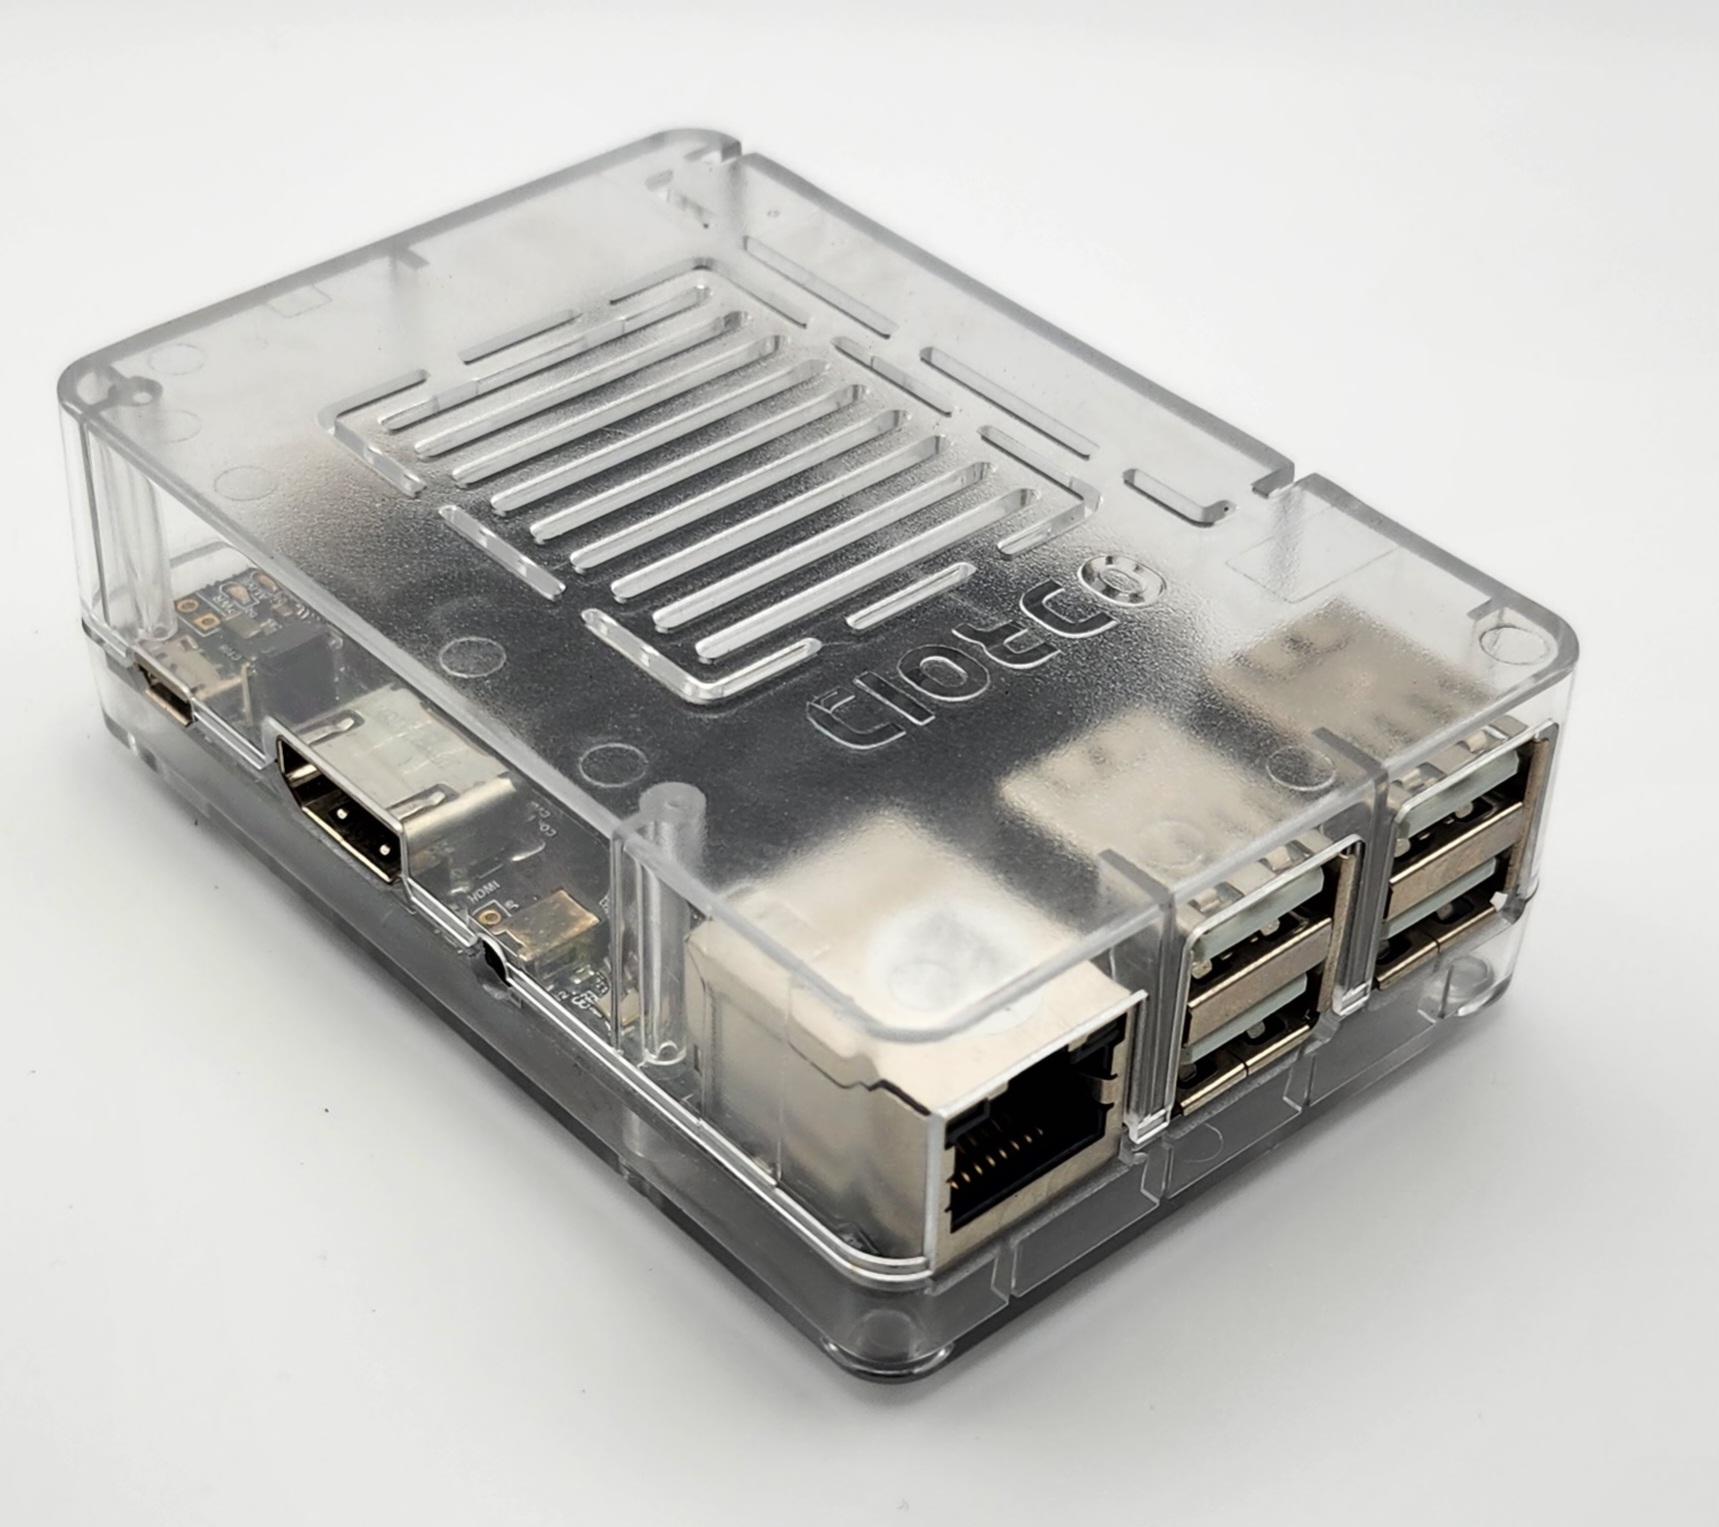
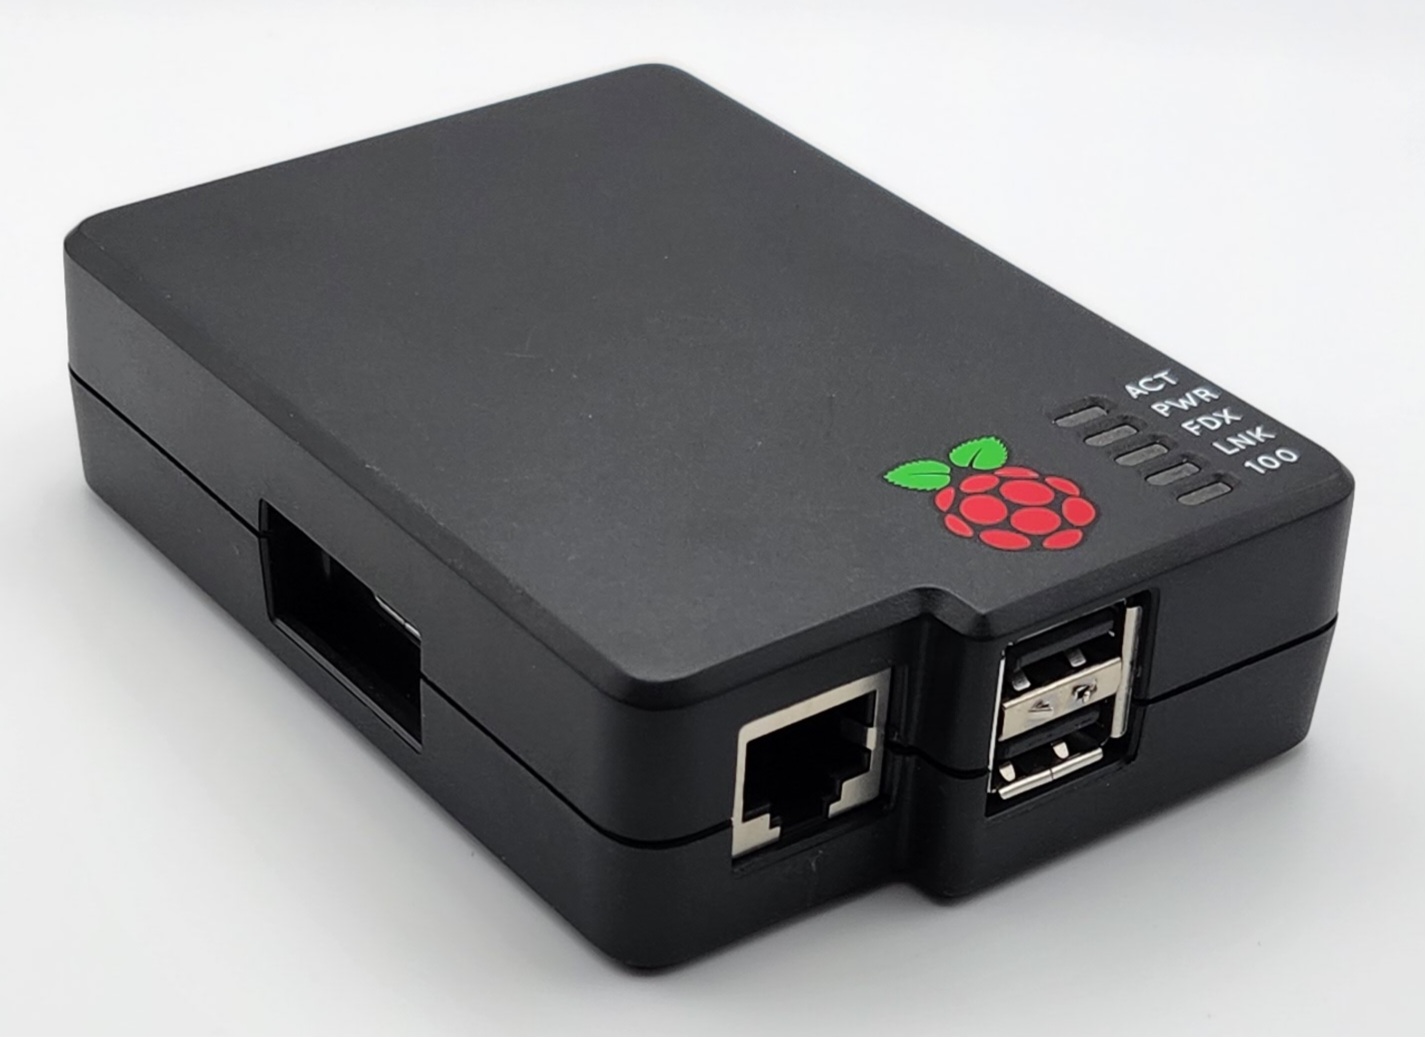
Raspberry Pi
Eventually, I did break down and get a Raspberry Pi. I had a specific purpose in mind and, much to my surprise, I have stuck to it :
Original Raspberry Pi
I was using one of the ODROID-XU4 units as a VPN gateway. Eventually, I wanted to convert the XU4 to something else and I decided to run the VPN gateway as an appliance on the simplest device I could. So I procured this complete hand-me-down unit from eBay and went to work. This was also the first time I discovered the DietPi distribution and this box has been in service running Wireguard via PiVPN for many years.
I also have a Raspberry Pi 3B+ kicking around somewhere. I used it as a Steam Link device for awhile.
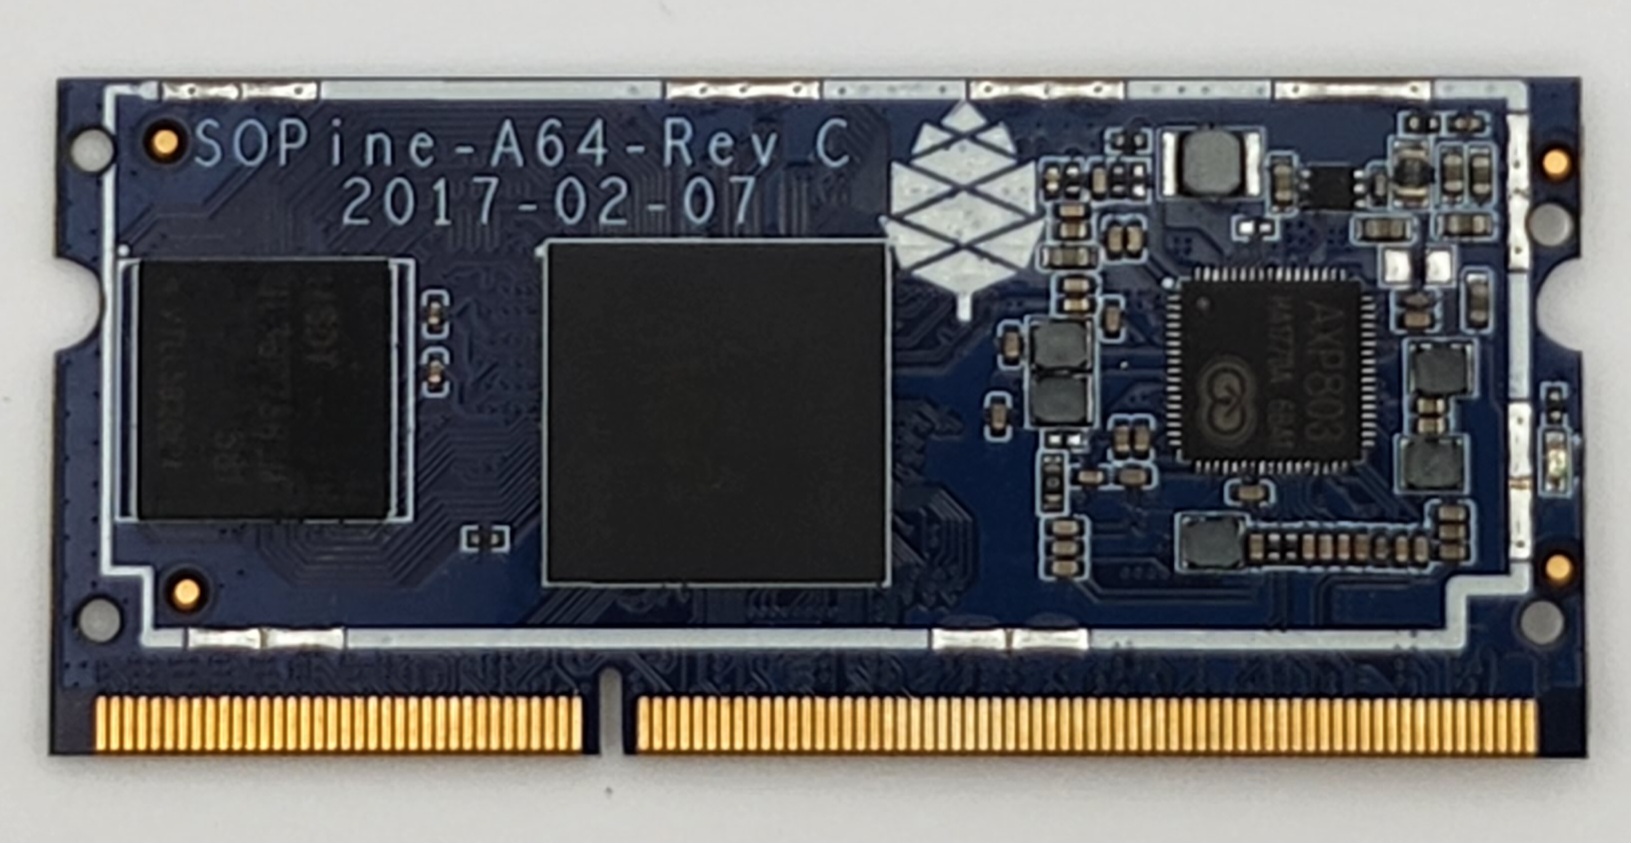
SOPINE + Baseboard
Also procured when I was on this “let’s buy random SBCs” kick. The Pine64 SOPINE is actually a compute module that comes in the form factor of a memory module.
Pine64 SOPINE Compute Module
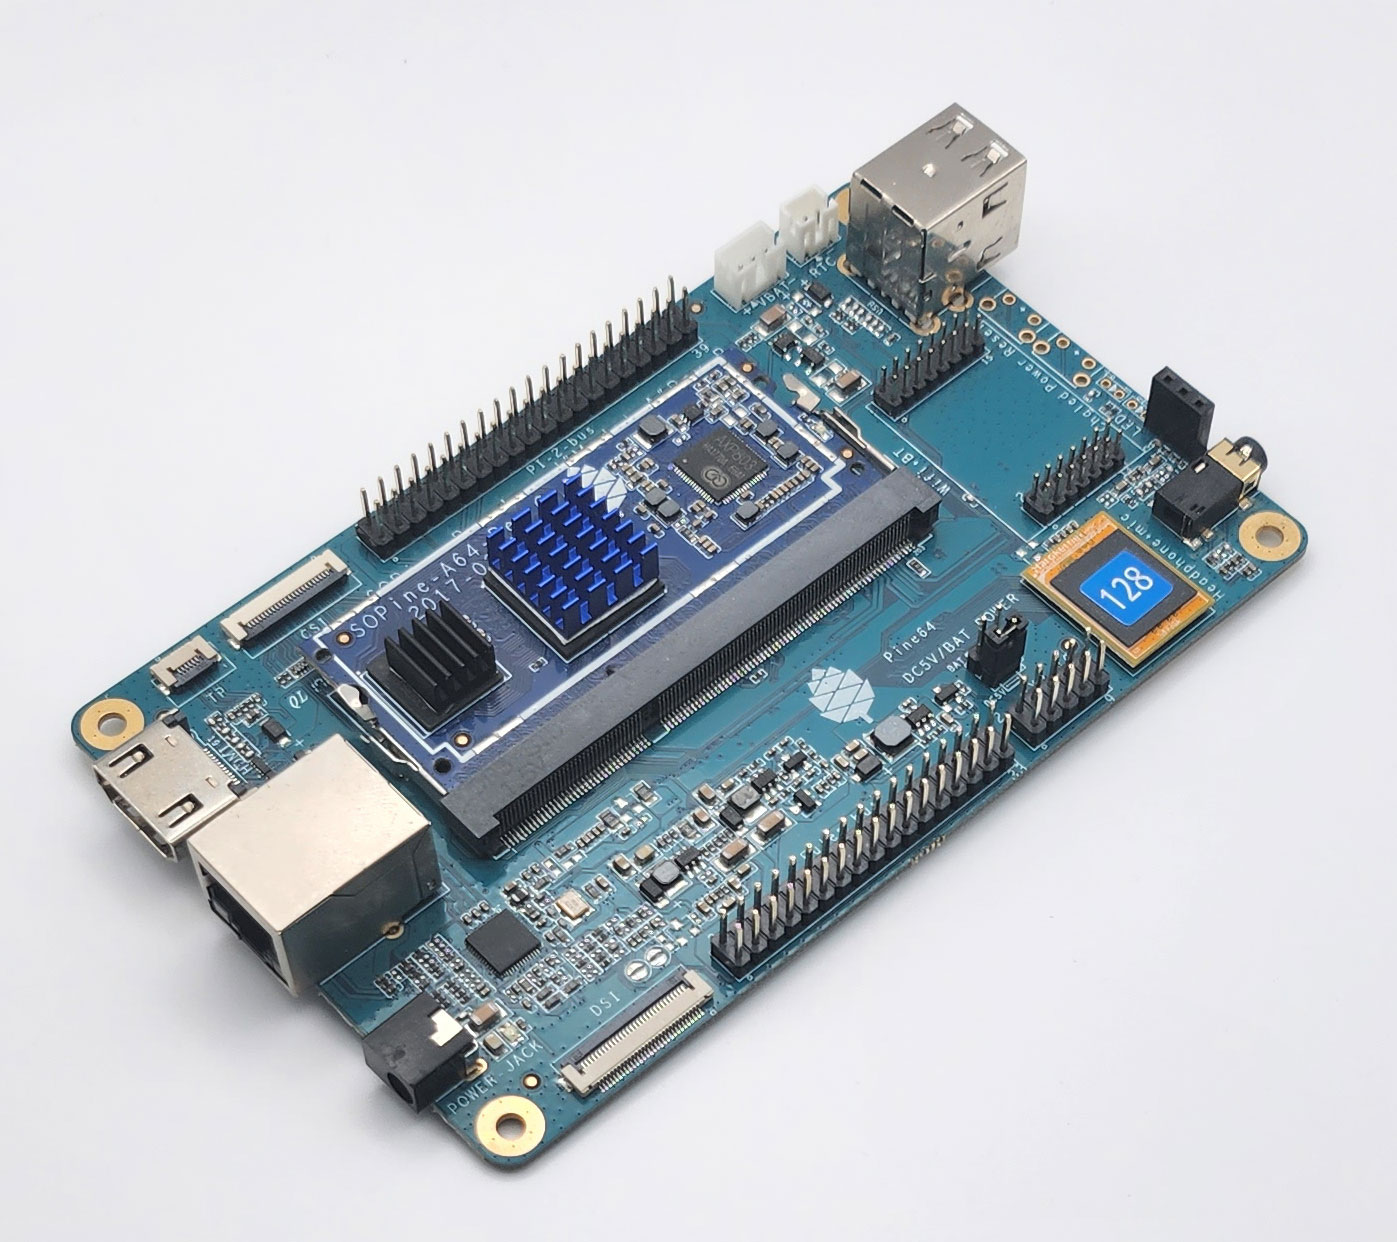
Back to using Allwinner SoCs. In order to make this thing useful, you need to place it in something. It’s possible to get a mini-ITX form factor board that can accommodate 7 of these modules. Before going to that extreme, there is this much simpler baseboard which can also use eMMC for storage.

Baseboard with SOPINE, eMMC, and heat sinks
I really need to find an appropriate case for this one as it currently performs its duty while sitting on an anti-static bag.
NanoPi NEO3
I enjoy running the DietPi distribution on many of these SBCs (as it’s developed not just for Raspberry Pi). I have also found their website to be a useful resource for discovering new SBCs. That’s how I found the NanoPi series and zeroed in on this NEO3 unit, sporting a Rockchip SoC, and photographed here with some American currency in order to illustrate its relative size :
NanoPi NEO3
I often forget about this computer because it’s off in another room, just quietly performing its assigned duty.
MangoPi MQ-Pro
So far, I’ve heard of these fruits prepending the Greek letter pi for naming small computing products :- Raspberry – the O.G.
- Banana – seems to be popular for hobbyist router/switches
- Orange
- Atomic
- Nano
- Mango
Okay, so the AtomicPi and NanoPi names don’t really make sense considering the fruit convention.
Anyway, the newest entry is the MangoPi. These showed up on Ameridroid a few months ago. There are 2 variants : the MQ-Pro and the MQ-Quad. I picked one and rolled with it.

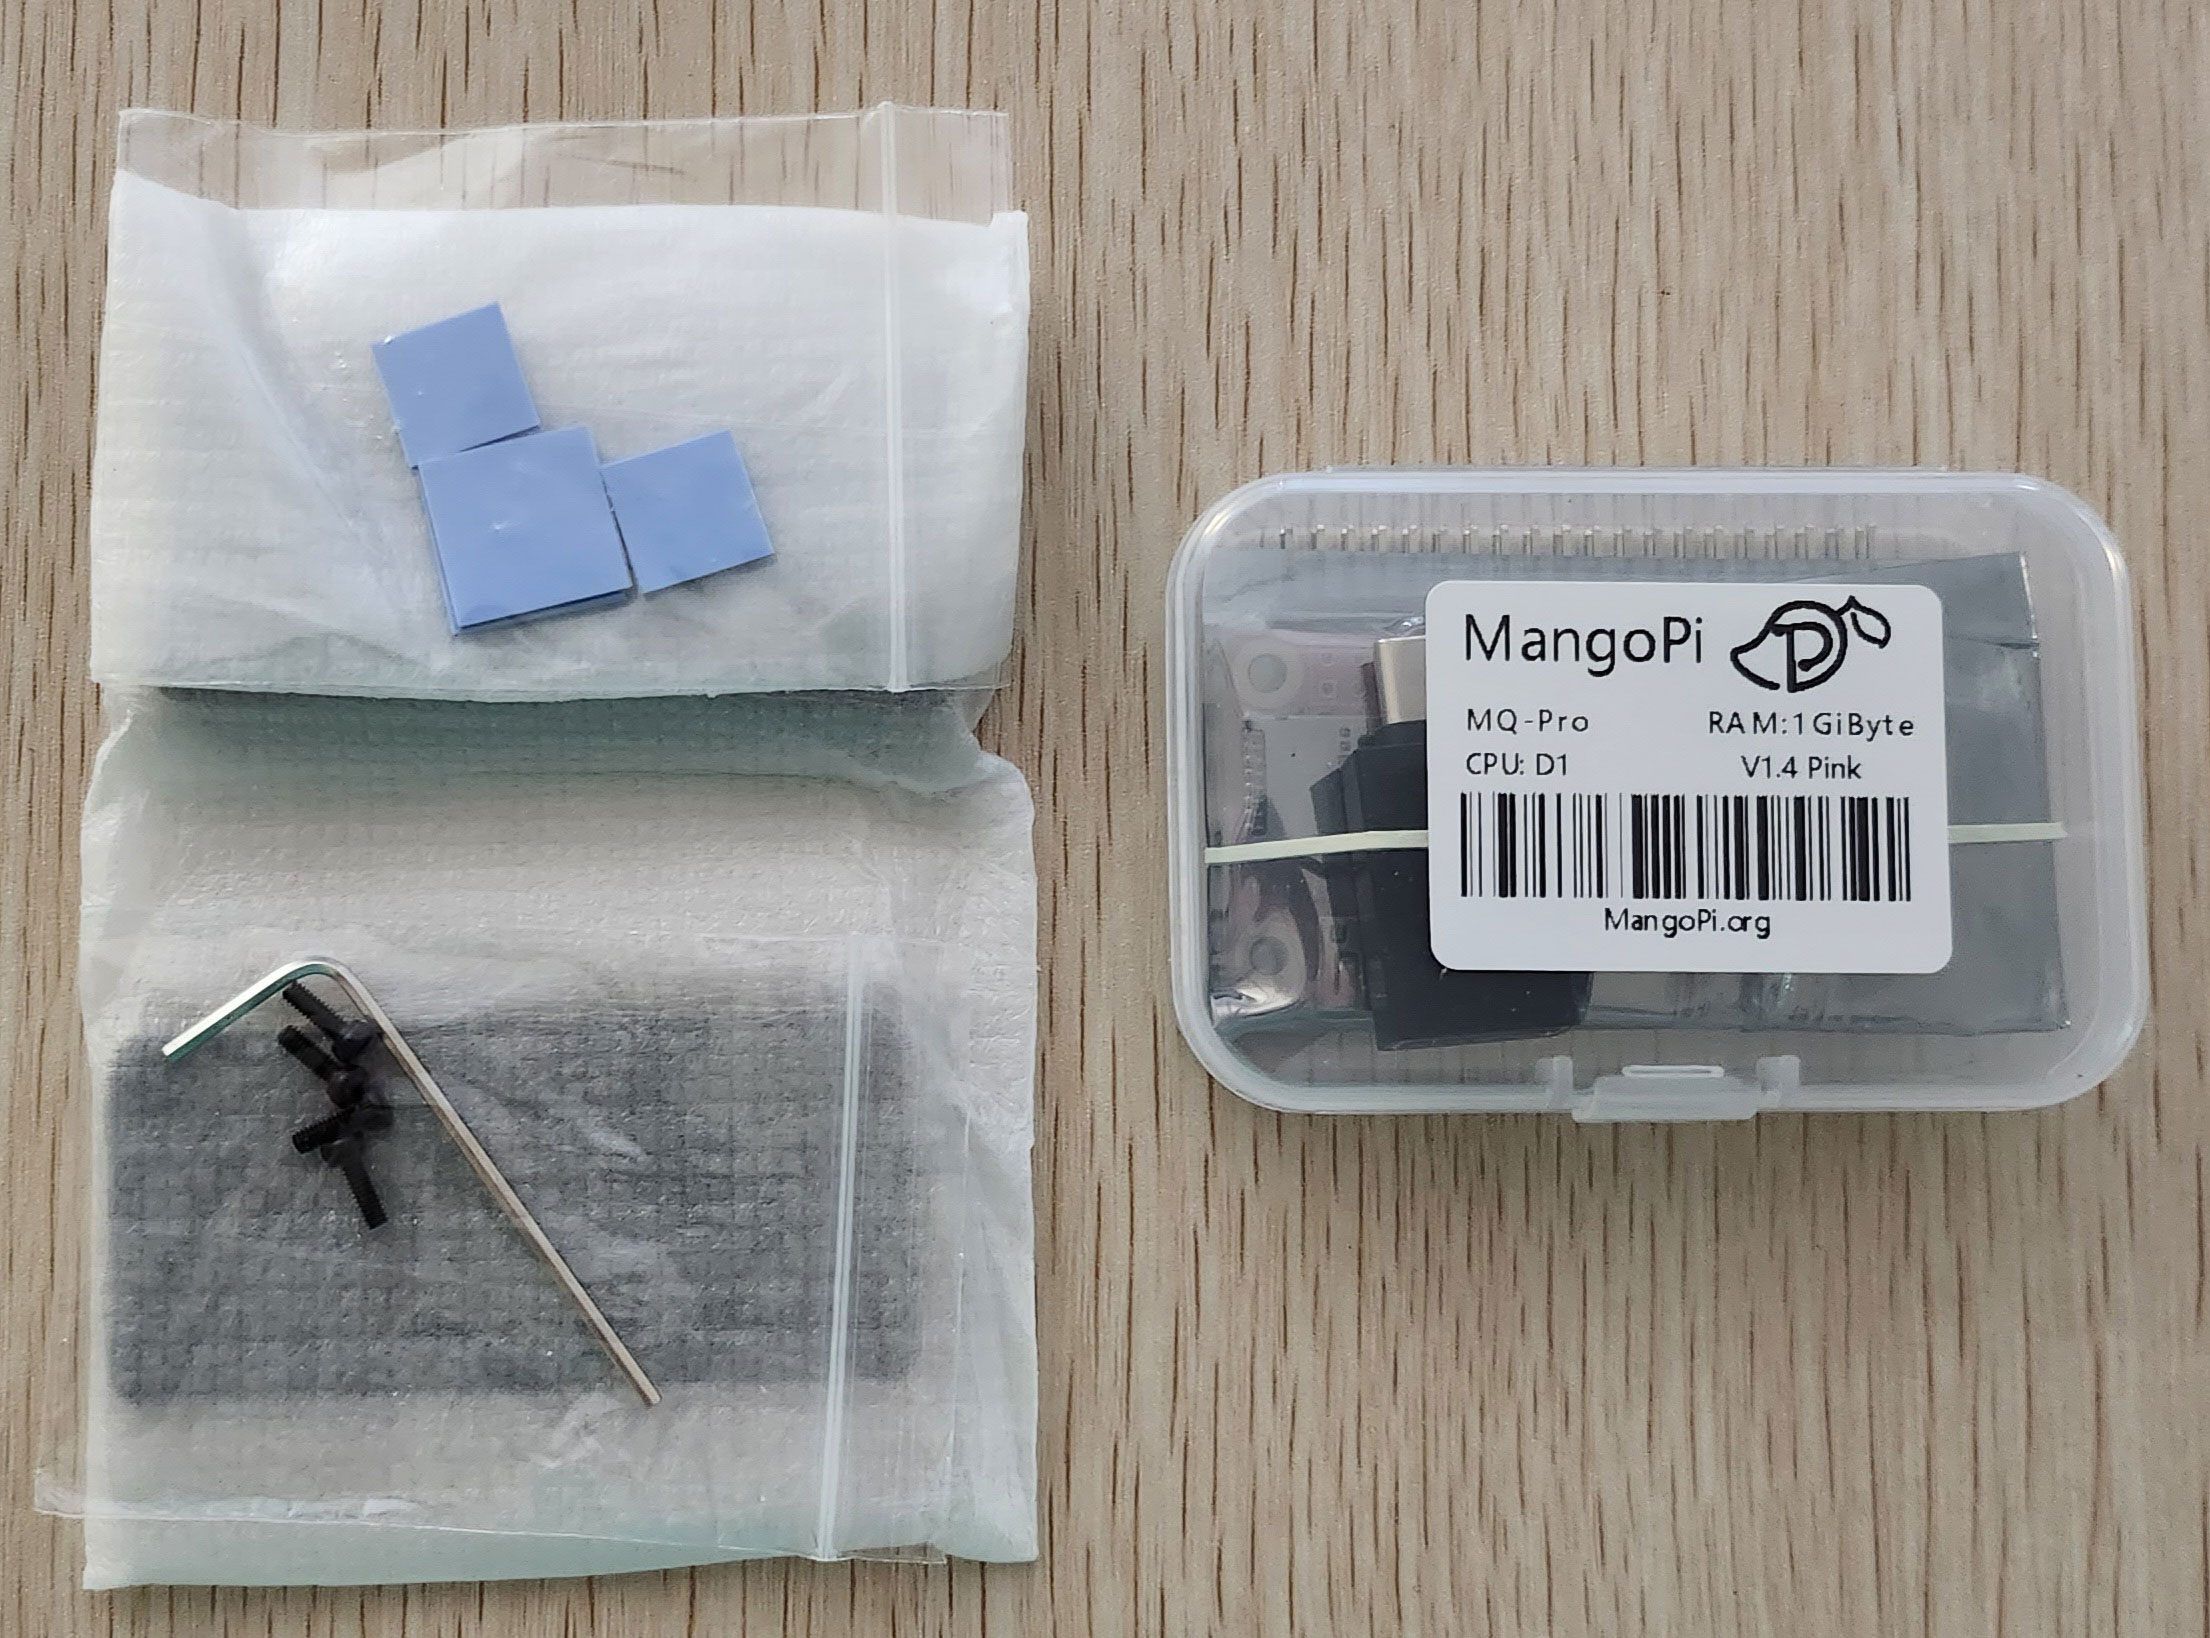
MangoPi MQ-Pro pieces arrive
When it arrived, I unpacked it, assembled the pieces, downloaded a distro, tossed that on a micro-SD card, connected a monitor and keyboard to it via its USB-C port, got the distro up and running, configured the wireless networking with a static IP address and installed sshd, and it was ready to go as a headless server for an edge application.

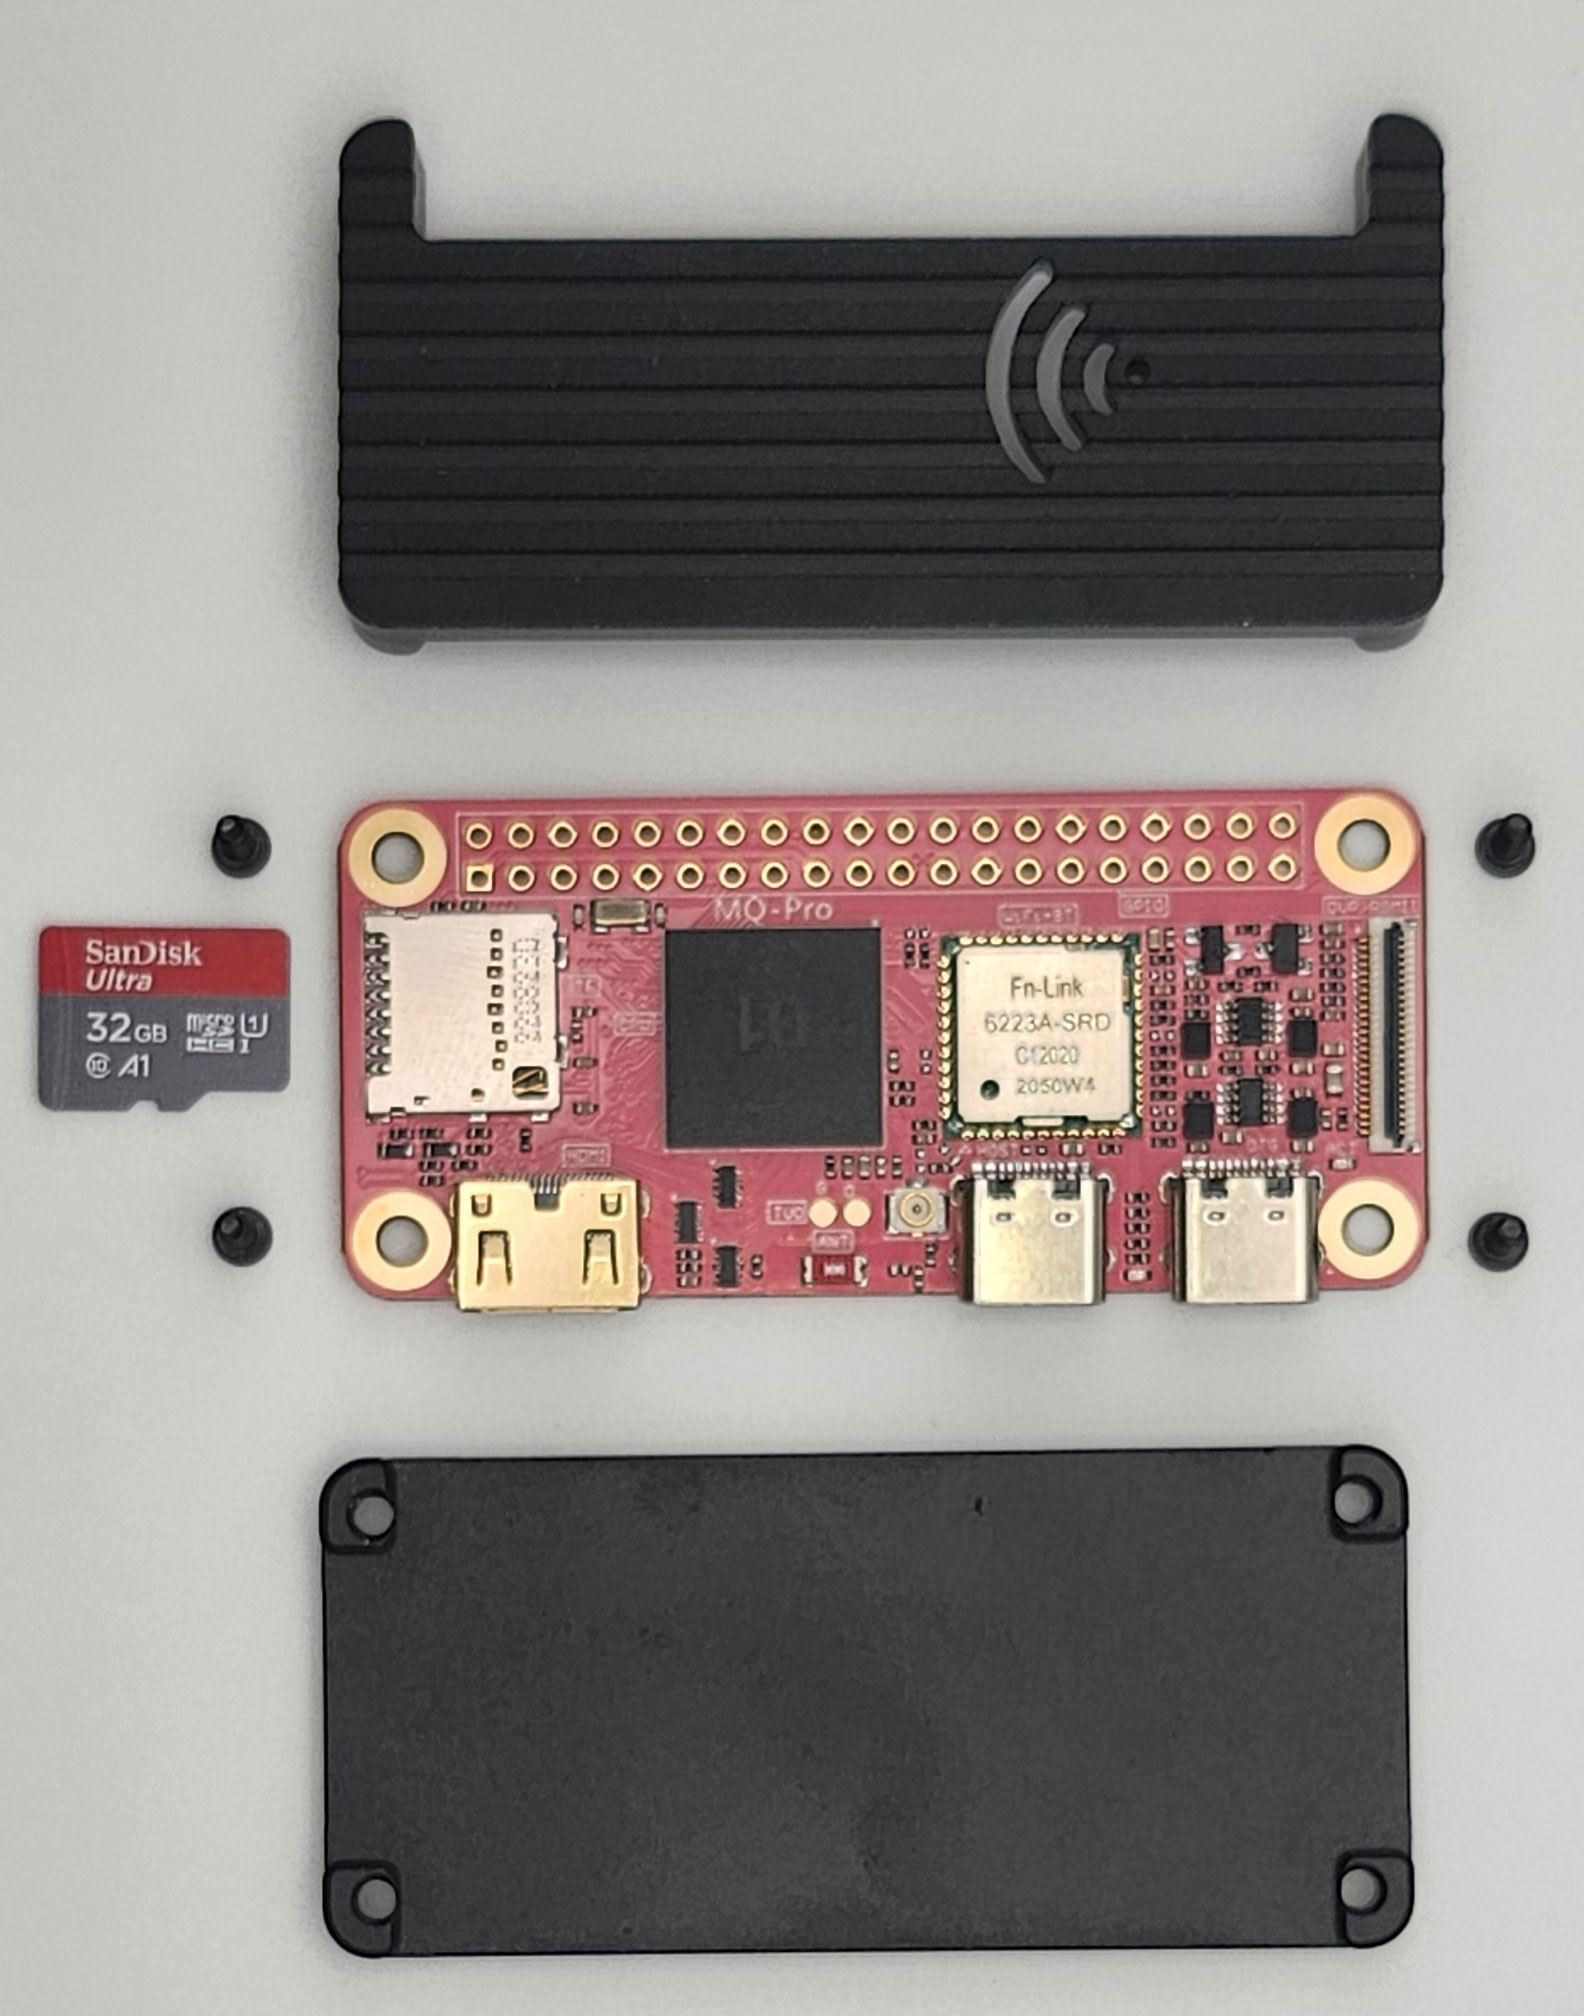
MangoPi MQ-Pro components, ready for assembly
The unit came with no instructions that I can recall. After I got it set up, I remember thinking, “What is wrong with me ? Why is it that I just know how to do all of this without any documentation ?”

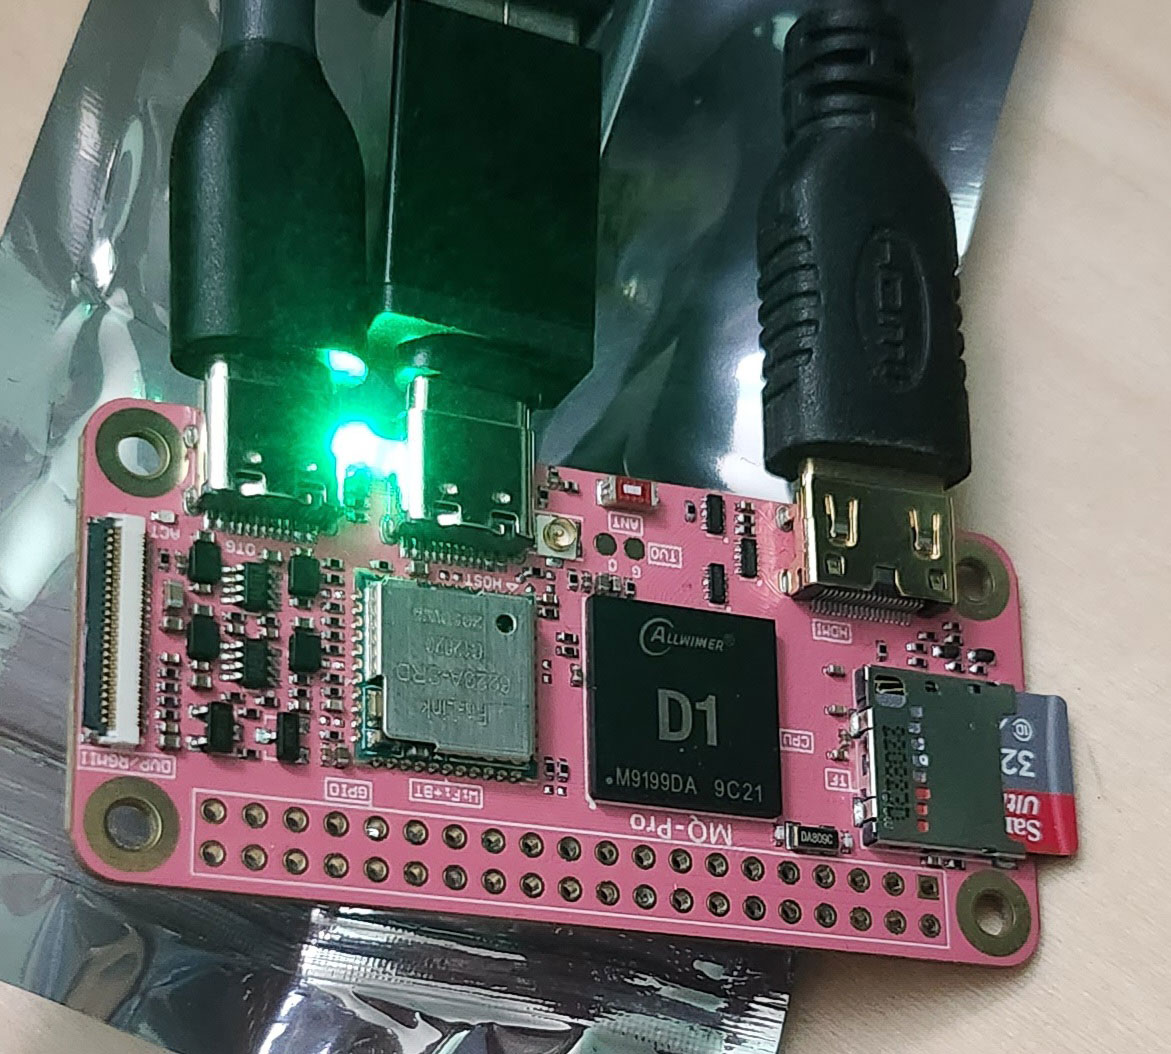
MangoPi MQ-Pro in first test
Only after I got it up and running and poked around a bit did I realize that this SBC doesn’t have an ARM SoC– it’s a RISC-V SoC. It uses the Allwinner D1, so it looks like I came full circle back to Allwinner.

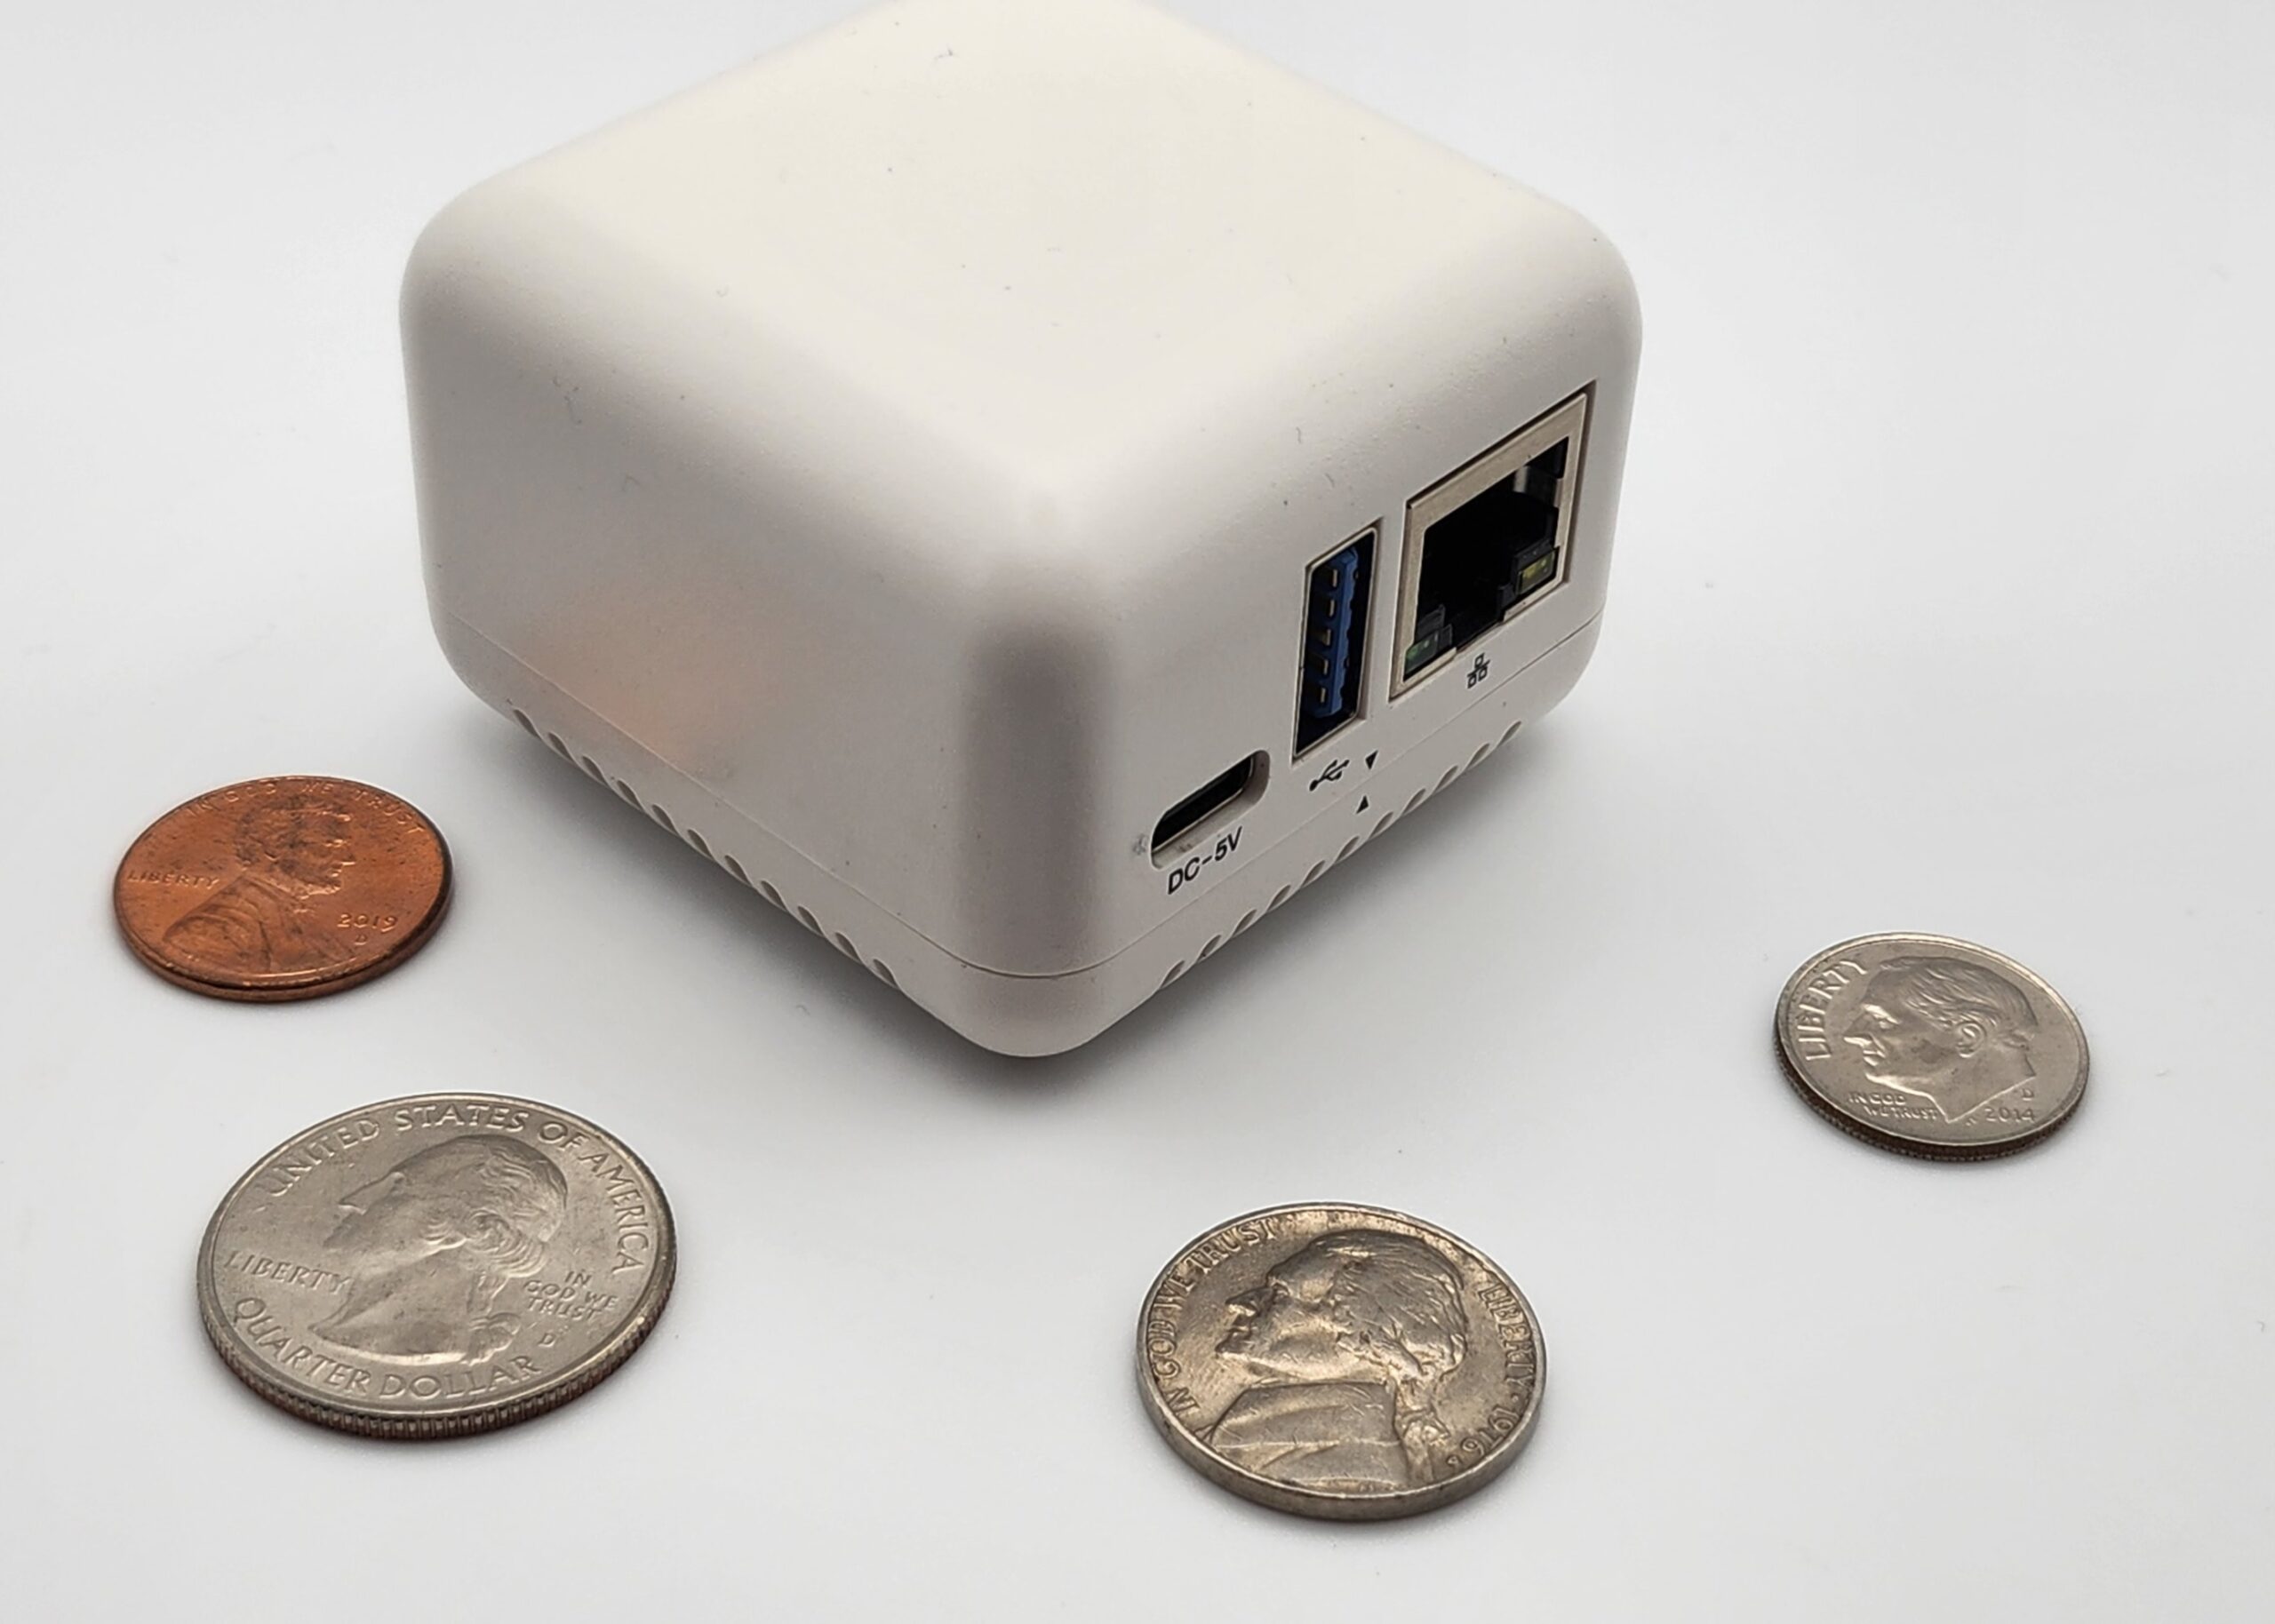
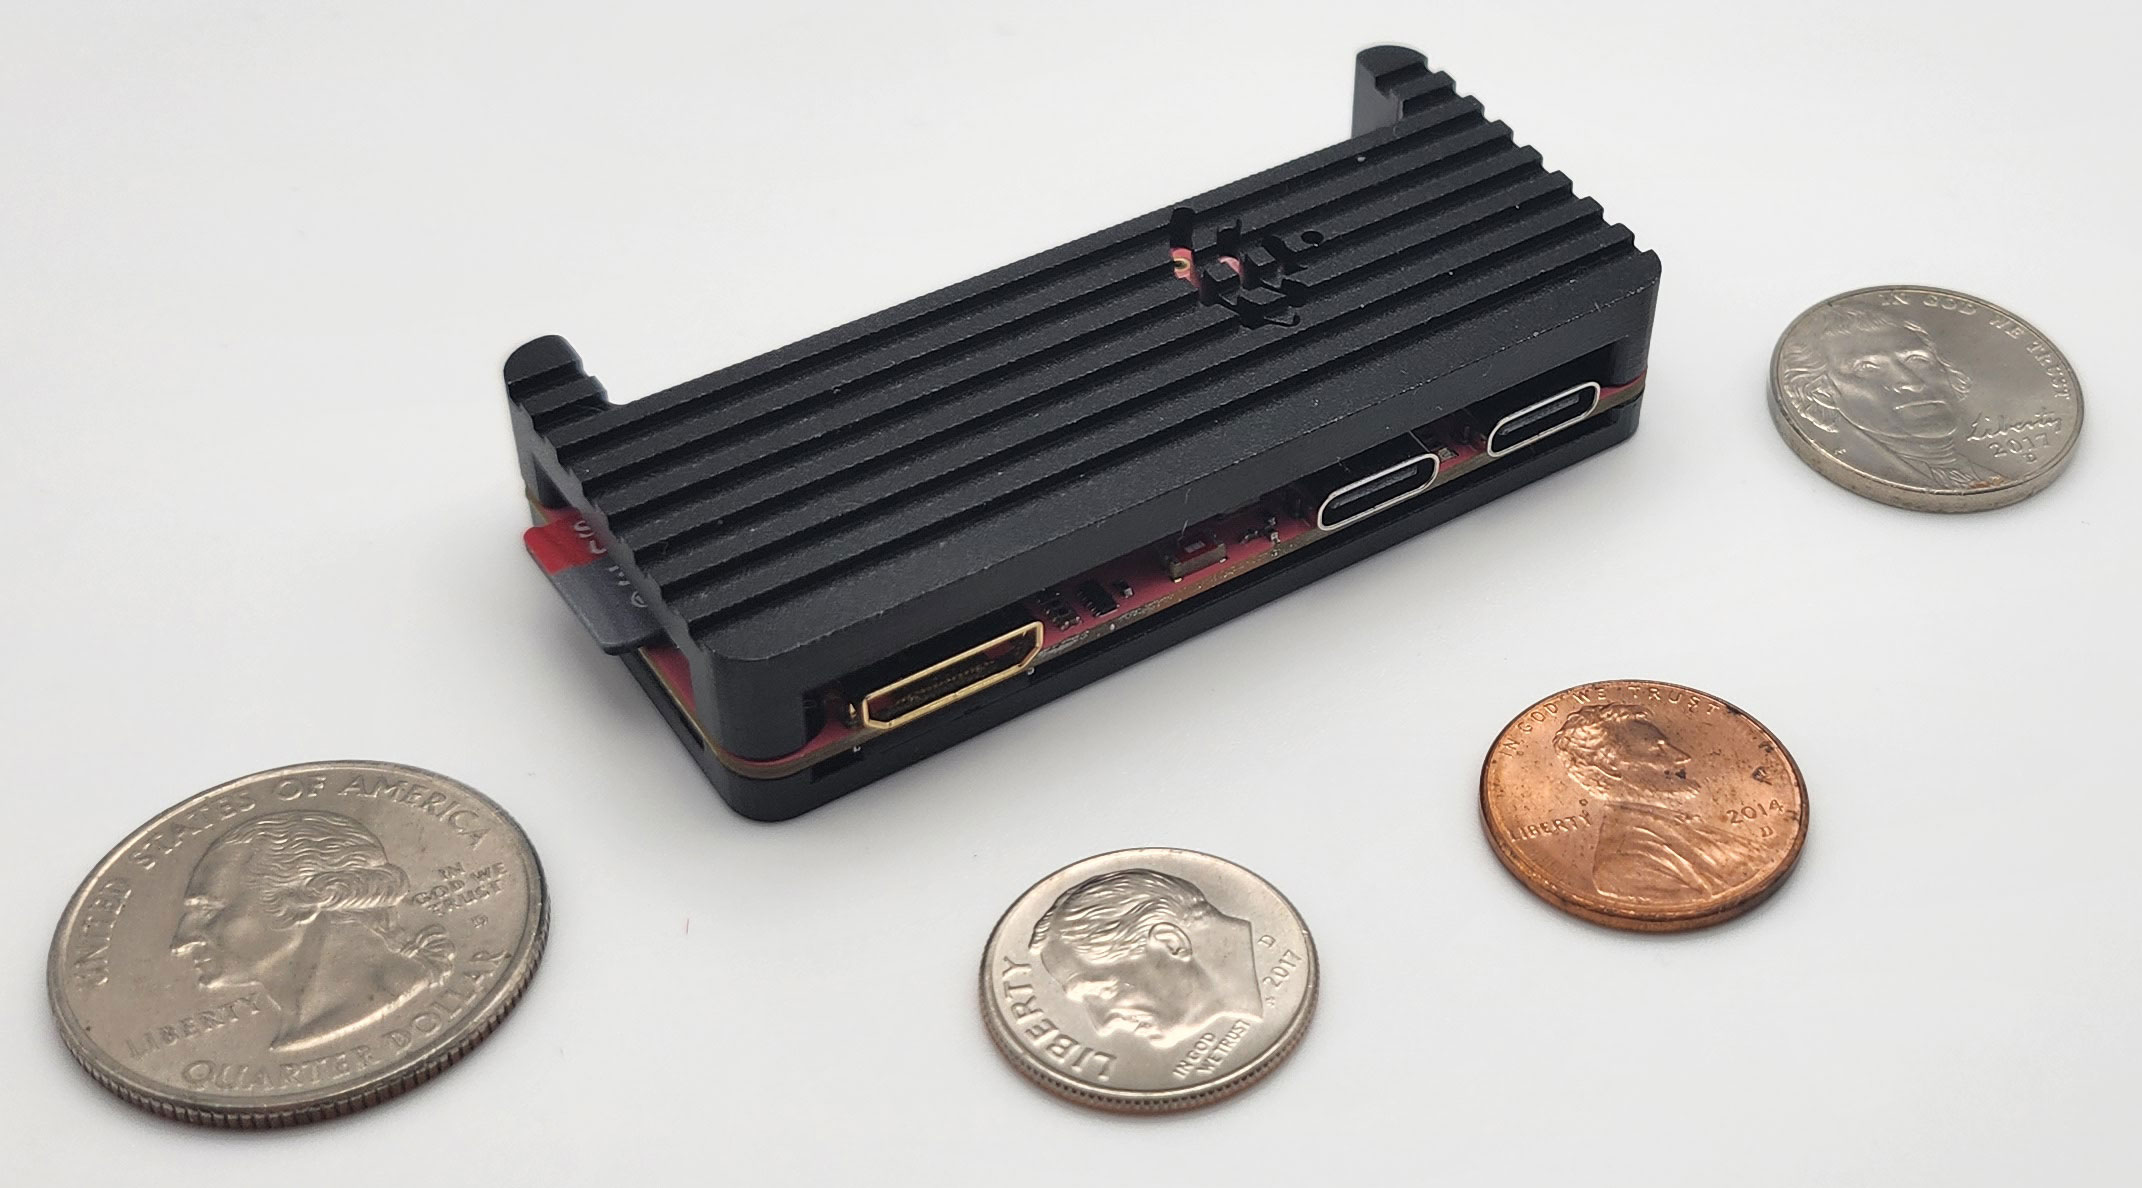
MangoPi MQ-Pro with more US coinage for scale
So I now have my first piece of RISC-V hobbyist kit, although I learned recently from Kostya that it’s not that great for multimedia.
Handheld Gaming Units
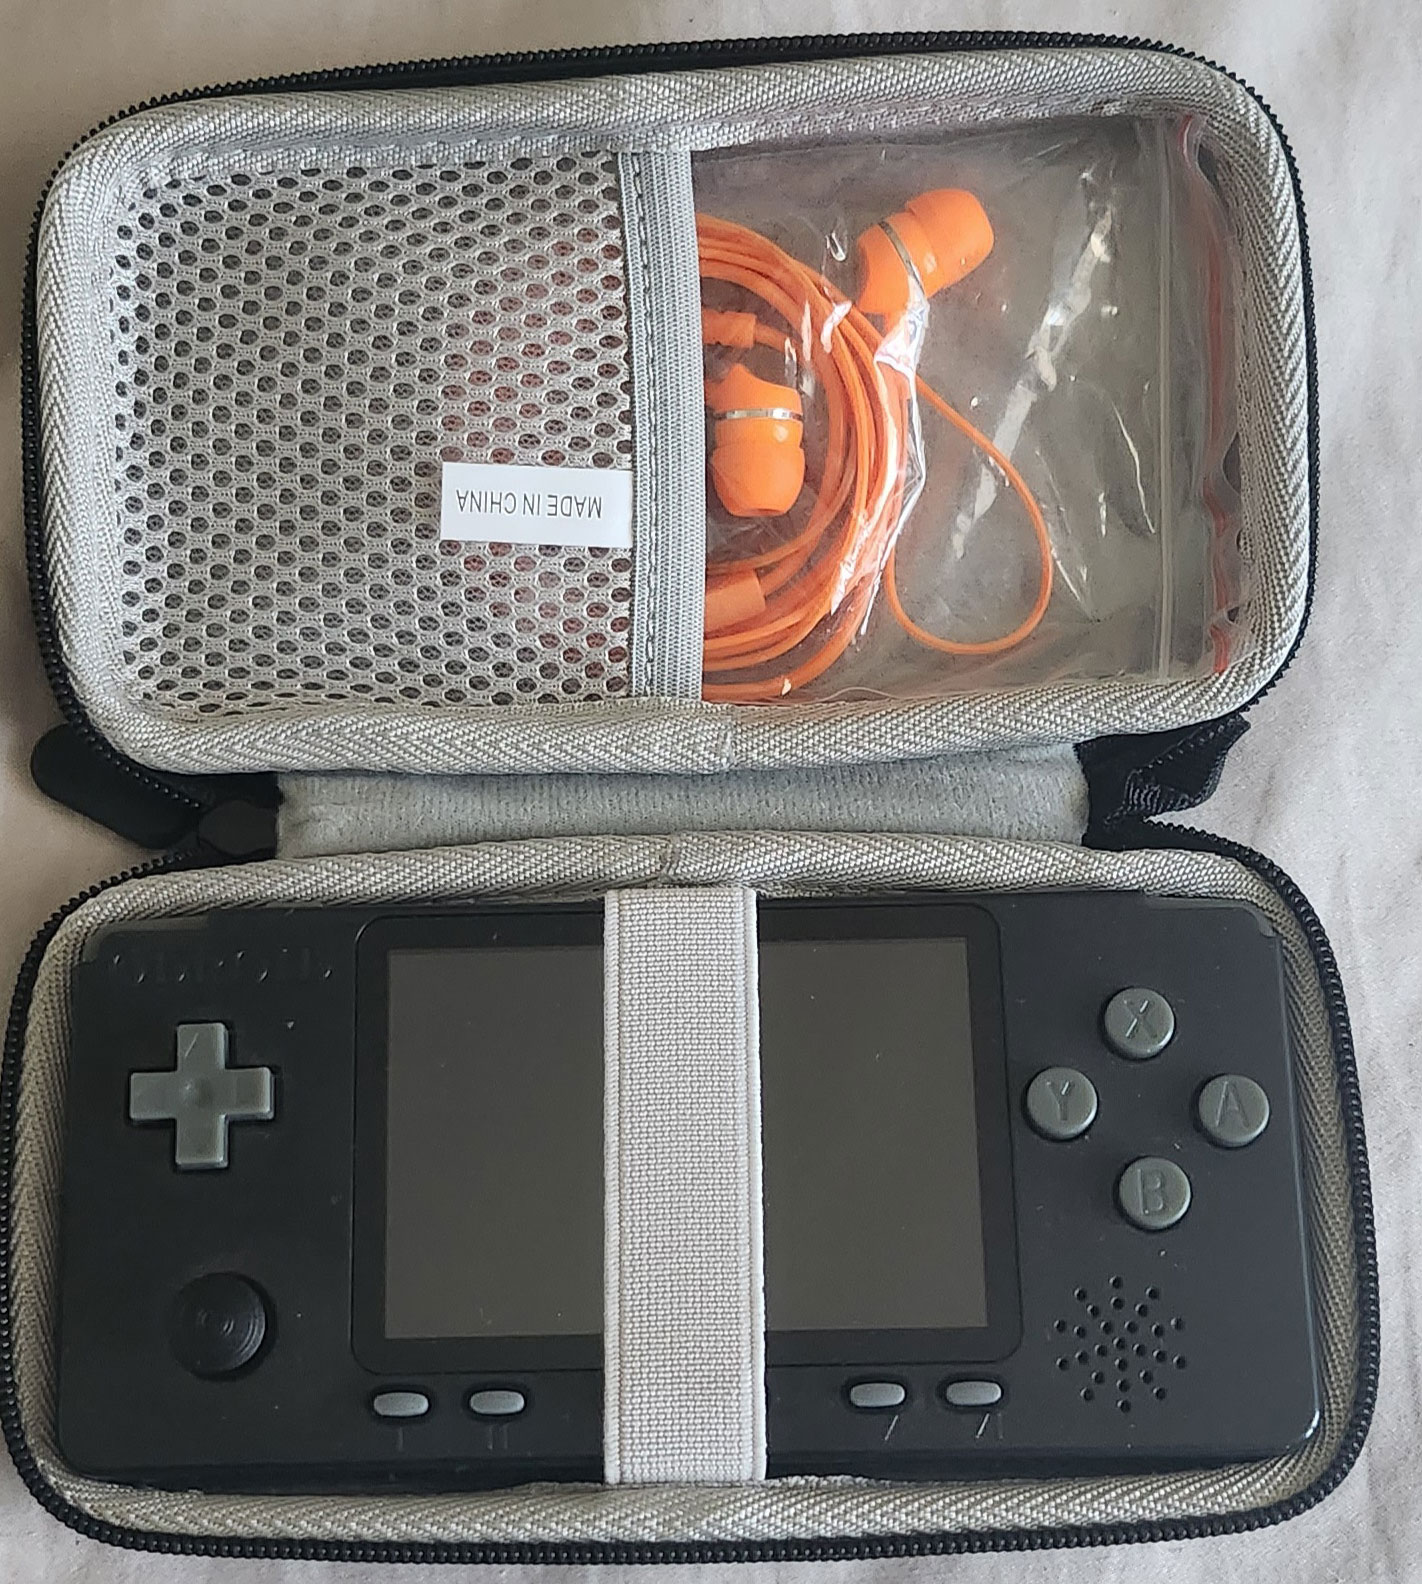
The folks at Hardkernel have also produced a series of handheld retro-gaming devices called ODROID-GO. The first one resembled the original Nintendo Game Boy, came as a kit to be assembled, and emulated 5 classic consoles. It also had some hackability to it. Quite a cool little device, and inexpensive too. I have since passed it along to another gaming enthusiast.Later came the ODROID-GO Advance, also a kit, but emulating more devices. I was extremely eager to get my hands on this since it could emulate SNES in addition to NES. It also features a headphone jack, unlike the earlier model. True to form, after I received mine, it took me about 13 months before I got around to assembling it. After that, the biggest challenge I had was trying to find an appropriate case for it.

ODROID-GO Advance with case and headphones
Even though it may try to copy the general aesthetic and form factor of the Game Boy Advance, cases for the GBA don’t fit this correctly.
Further, Hardkernel have also released the ODROID-GO Super and Ultra models that do more and more. The Advance, Super, and Ultra models have powerful SoCs and feature much more hackability than the first ODROID-GO model.
I know that the guts of the Advance have been used in other products as well. The same is likely true for the Super and Ultra.
Ultimately, the ODROID-GO Advance was just another project I assembled and then set aside since I like the idea of playing old games much more than actually doing it. Plus, the fact has finally crystalized in my mind over the past few years that I have never enjoyed handheld gaming and likely will never enjoy handheld gaming, even after I started wearing glasses. Not that I’m averse to old Game Boy / Color / Advance games, but if I’m going to play them, I’d rather emulate them on a large display.
The Future
In some of my weaker moments, I consider ordering up certain Banana Pi products (like the Banana Pi BPI-R2) with a case and doing my own router tricks using some open source router/firewall solution. And then I remind myself that my existing prosumer-type home router is doing just fine. But maybe one day…The post My SBC Collection first appeared on Breaking Eggs And Making Omelettes.
-
Revision 30966 : eviter le moche ’doctype_ecrire’ lors de l’upgrade
17 août 2009, par fil@… — Logeviter le moche ’doctype_ecrire’ lors de l’upgrade