Recherche avancée
Médias (1)
-

Rennes Emotion Map 2010-11
19 octobre 2011, par
Mis à jour : Juillet 2013
Langue : français
Type : Texte
Autres articles (33)
-
Websites made with MediaSPIP
2 mai 2011, parThis page lists some websites based on MediaSPIP.
-
Creating farms of unique websites
13 avril 2011, parMediaSPIP platforms can be installed as a farm, with a single "core" hosted on a dedicated server and used by multiple websites.
This allows (among other things) : implementation costs to be shared between several different projects / individuals rapid deployment of multiple unique sites creation of groups of like-minded sites, making it possible to browse media in a more controlled and selective environment than the major "open" (...) -
Contribute to a better visual interface
13 avril 2011MediaSPIP is based on a system of themes and templates. Templates define the placement of information on the page, and can be adapted to a wide range of uses. Themes define the overall graphic appearance of the site.
Anyone can submit a new graphic theme or template and make it available to the MediaSPIP community.
Sur d’autres sites (6282)
-
How Funnel for Piwik Analytics enriches your Piwik experience giving you ultimate insights and debugging capabilities
13 janvier 2017, par InnoCraft — CommunityNo matter what type of website or app you have, whether you are trying to get your users to sign up for something or sell products, there is a certain number of steps your visitors have to go through. On every step you lose visitors and therefore potential revenue and conversions. Therefore it is critical to know where your visitors actually follow those steps in your website or app, where you lose them and where your visitors maybe get confused. By defining a funnel, you can improve your conversion rates, sales and revenue as you can exactly determine where you lose your visitors in converting your goal or a sale.
A Funnel defines a series of steps that you expect your visitors to take on their way to converting a goal. Funnels, a premium feature for Piwik developed by InnoCraft, lets you create funnels to get the data you need to improve your websites and mobile apps. Learn more about Funnel.
In this blog post we will cover the reports the Funnel plugin provides. The next blog post shows you how to configure and validate your funnel in Piwik.

Integration in Goal reports
At Piwik and InnoCraft, we usually start looking into our goal reports. Funnel integrates directly into each goal reporting page giving you a quick overview how your funnel is doing. This saves us a lot of time as we don’t have to separately look into each funnel page and only takes us maybe an additional second to keep an eye on our funnels. By clicking on the headline or “View funnel report” link, you can directly go to the funnel report to get a more detailed report if you notice any spike in the evolution of the conversions or conversion rate.

Getting an overall Funnel overview
Next we usually go to the “Funnel Overview” page where it shows a list of all activated Funnels and their performance over time. You will find the look familiar as it is similar to the “Goals Overview” page. If we find something unusual there, for example any spikes, we usually directly click on the headline of the Funnel to go to the detailed Funnel report. You can also choose a funnel from the left reporting menu or search for a funnel by entering the shortcut “f”.

Viewing a funnel report
A funnel reporting page looks very similar to a Goal reporting page. It starts with an evolution graph and sparklines showing you the performance of your funnel over time.

In the evolution graph you can select the metrics you want to plot. We usually have an eye on the funnel conversion rate and the number of “Funnel entries” or the number of “Funnel conversions”. The conversion rate alone does not show you how your funnel is performing. Imagine the rate is always stable at around 20% and you might think everything is alright, but if the number of visitors that take part in your funnel goes down, you might have a problem as the number of funnel conversions actually decreases even though the rate is the same. So we recommend to not only have a look at the conversion rate. The report will remember the metrics you want to plot each time you open it so you don’t have to re-select them over and over again.

The funnel overview
In the funnel overview we are giving you more details about the funnel and goal related conversion metrics so you don’t have to switch between the goal and funnel report and compare them easily.
When you analyze a funnel report, you might not always remember how the funnel is configured. Even though you specify names for each step you sometimes need to know on which pages a certain step will be activated. By clicking on the funnel summary link you can quickly look into the funnel configuration and also see all important metrics at a glance in a simple table without having to scroll.

You might also notice the Visitor Log link which will show you all actions for all visitors that have entered this funnel. This lets you really understand how your visitors navigate through your website and how they proceeded, exited or converted your funnel on a visitor level.

The Funnel visualization
Below the funnel overview you can visually see where your visitors entered, proceeded, converted and exited your funnel. We kept the UI clean so you can focus on the important things.
Most tools only give you the pages where visitors have entered your funnel but we do better and also show you the list of external referrers used by visitors to enter your funnel directly (marketing campaigns, search engines or other websites). Also we do not only show only the top 5 pages but up to 100 pages and 50 referrers (more can be configured if needed). When you hover a row, you will not only see the number of hits but also the percentage each row has contributed to the entries. Here you want to look and understand how your visitors enter your funnel and based on the data maybe invest in successful referrers, campaigns and pages. If the pages or referrers you expect to see there don’t show up, your users might not understand the path you had in mind for them.

Next you may notice how many visits have gone through each step, in this case 3487 visits. The green and red bar lets you quickly identify how many of your visitors have proceeded to the next step (green) compared to how many have exited the funnel at this step (red). Ideally, most of the bar is green and not red indicating that more visitors proceed to the next step than they exit.

Now the next feature is really valuable. When you hover the step title or the number of visits, you will notice that two icons appear :

Those two little icons are really powerful and give you even more insights to really dig into all the data. The left icon shows you the visitor log showing all actions of each visitor that have participated in this particular funnel step. This means for each step you get to see all the details and actions of each visitor. This lets you really debug and understand problems in your funnel.
At InnoCraft, we understand that plain numbers are often not so valuable. Only the evolution over time, when you put the numbers in relation to something else you can really understand how your website is doing. The icon to the right lets you do exactly this, it lets you view the row evolution for each funnel step. We are sure you will enjoy this feature. It lets you explore how each funnel step is doing over time. For example the number of entries for a step or how many proceeded to the next step from here over time. Here you ideally want to see that the “Proceeded Rate” increases over time, meaning more and more visitors actually proceed to the next step instead of exiting it.

We are sure you will really love those features that give you just those extra insights that other tools don’t give you.
On the right you can find out where your visitors went to, if they did not proceed any further in the funnel. This lets you better understand why they left the funnel and did not proceed any further.

At the end of the funnel report you find again the number of conversions and the conversion rate. Here we recommend looking into the visitor log when you hover the name of the last step as you can analyze how each visitor converted this funnel in detail.

Applying segments
Funnels lets you apply any Piwik segment to the Funnel report allowing you to dice your visitors multiplying the value you get out of Funnel. For example you may want to apply a segment and analyze the funnel for visitors that have visited your website or mobile app for the first time vs. recurring visitors. Sometimes it may be interesting how visitors from different countries go through your funnel, the possibilities are endless. We really recommend to take advantage of segments to understand your different target groups even better.
The plugin also adds some new segments to your Piwik letting you segment any Piwik report by visitors that have participated in a funnel or participated in a particular funnel step. For example you could go to the “Visitors => Locations” report and apply a segment for your funnel to see which countries have participated or converted most in your funnel.
Widgets, Scheduled Reports, and more.
This is not where the fun ends. Funnels defines new widgets that you can add to your dashboard or export it into a third party website. You can set up scheduled reports to receive the Funnel report automatically via email or sms or download the report to share it with your colleagues. It works also very well with Custom Alerts and you can view the Funnel report in the Piwik Mobile app. You can manage Funnels via HTTP API and also fetch all Funnel reports via the HTTP Reporting API. The plugin is really nicely integrated into Piwik we will need some more blog posts to show you all the ways Funnels advances your Piwik experience and how it lets you dig into all the data so you can increase your conversions and sales based on this data.
How to get Funnels and related features
You can get Funnels on the Piwik Marketplace. If you want to learn more about Funnels you might be also interested in the Funnel User Guide and the Funnel FAQ.
Similar to Funnels we also offer Users Flow which lets you visualize the flow of your users and visitors across several interactions.
-
Dreamcast SD Adapter and DreamShell
31 décembre 2014, par Multimedia Mike — Sega DreamcastNope ! I’m never going to let go of the Sega Dreamcast hacking. When I was playing around with Dreamcast hacking early last year, I became aware that there is such a thing as an SD card adapter for the DC that plugs into the port normally reserved for the odd DC link cable. Of course I wanted to see what I could do with it.
The primary software that leverages the DC SD adapter is called DreamShell. Working with this adapter and the software requires some skill and guesswork. Searching for these topics tends to turn up results from various forums where people are trying to cargo-cult their way to solutions. I have a strange feeling that this post might become the unofficial English-language documentation on the matter.
Use Cases
What can you do with this thing ? Undoubtedly, the primary use is for backing up (ripping) the contents of GD-ROMs (the custom optical format used for the DC) and playing those backed up (ripped) copies. Presumably, users of this device leverage the latter use case more than the former, i.e., download ripped games, load them on the SD card, and launch them using DreamShell.However, there are other uses such as multimedia playback, system exploration, BIOS reprogramming, high-level programming, and probably a few other things I haven’t figured out yet.
Delivery
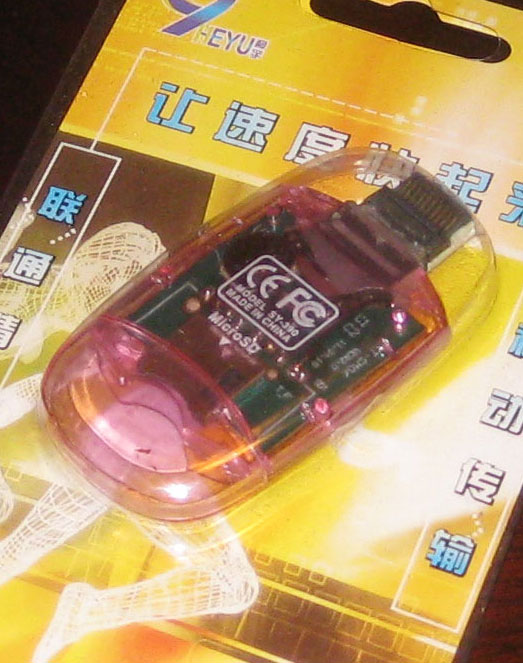
I put in an order via the dc-sd.com website and in about 2 short months, the item arrived from China. This marked my third lifetime delivery from China and curiously, all 3 of the shipments have pertained to the Sega Dreamcast.

Click for larger image
I thought it was very interesting that this adapter came in such complete packaging. The text is all in Chinese, though the back states “Windows 98 / ME / 2000 / XP, Mac OS 9.1, LINUX2.4”. That’s what tipped me off that they must have just cannibalized some old USB SD card readers and packaging in order to create these. Closer inspection of the internals through the translucent pink case confirms this.
Usage
According to its change log, DreamShell has been around for a long time with version 1.0.0 released in February of 2004. The current version is 4.0.0 RC3. There are several downloads available :- DreamShell 4.0 RC 3 CDI Image
- DreamShell 4.0 RC 3 + Boot Loader
- DreamShell 4.0 RC 3 + Core CDI image
Option #2 worked for me. It contains a CDI disc image and the DreamShell files in a directory named DS/.
Burn the CDI to a CD-R in the normal way you would burn a bootable Dreamcast disc from a CDI image. This is open-ended and left as an exercise to the reader, since there are many procedures depending on platform. On Linux, I used a small script I found once called burncdi-dc.sh.
Then, copy the contents of the DS/ folder to an SD card. As for filesystem, FAT16 and FAT32 are both known to work. The files in DS/ should land in the root of the SD card ; the folder DS/ should not be in the root.
Plug the SD card into the DC SD adapter and plug the adapter in the link cable port on the back of the Dreamcast. Then, boot the disc. If it works, you will see this minor corruption of the usual Sega licensing screen :

Then, there will be a brief white-on-black text screen that explains the booting process :

Then, there will be the main DreamShell logo :

Finally, you will land on the DreamShell main desktop :

Skepticism
At first, I was supremely skeptical of the idea that this SD adapter could perform speedily enough to play games reasonably. This was predicated on the observation that my DC coder’s cable that I used to use for homebrew development could not transfer faster than 115200 bits/second, amounting to about 11 kbytes/sec. I assumed that this was a fundamental limitation of the link port.In fact, I ripped a few of my Dreamcast discs over a decade ago and still have those rips lying around. So I copied the ISO image of Resident Evil : Code Veronica — the game I personally played most on the DC — to the SD card (anywhere works) and used the “ISO loader” icon seen on the desktop above to launch the game.
It works :

The opening FMV plays at full speed. Everything loads as fast as I remember. I was quite surprised.
Digression : My assumptions about serial speeds have often been mistaken. 10 years ago, I heard stories about how we would soon be able to watch streaming video on our cell phones. I scoffed because I thought the 56K limitation of dialup modems was some sort of fundamental speed-of-light type of limitation for telephony bandwidth, wired or wireless.
The desktop menu also includes a ‘speedtest’ tool that profiles the write and read performance of your preferred storage medium. For my fastest SD card (a PNY 2 GB card) :

This is probably more representative of the true adapter bandwidth as reading and writing is a good deal faster through more modern interfaces on PC and Mac with this same card.
Look at the other options on the speedtest console. Hard drive ? Apparently, it’s possible, but it requires a good deal more hardware hacking than just purchasing this SD adapter.
Ripping
As you can see from the Resident Evil screenshot, playing games works quite nicely. How about ripping ? I’m pleased to say that DreamShell has a beautiful ripping interface :

Enter a name for the disc (or read the disc label), select the storage medium, and let it, well, rip. It indicates which track it’s working on and the Sega logo acts as a progress bar, shading blue as the track rip progresses.
I’m finally, efficiently, archiving that collection of Sega Dreamcast demo discs ; I’m hoping they’ll eventually find a home at the Internet Archive. How is overall ripping performance ? Usually about 38-40 minutes to rip a full 900-1000 MB. That certainly beats the 27-28 hours that were required when I performed the ripping at 11 kbytes/sec via the DC coders cable.
All is well until I get a sector reading error :

That’s when it can come in handy to have 3 DC consoles (see ?! not crazy !).
Other Uses
There’s a file explorer. You can browse the filesystem of the SD card, visual memory unit, or the CD portion of the GD-ROM (would be more useful if it accessed the GD area). There are FFmpeg files included. So I threw a random Cinepak file and random MPEG-1 file at it to see what happens. MPEG-1 didn’t do anything, but this Cinepak file from some Sierra game played handily :

If you must enter strings, it helps to have a Dreamcast keyboard (which I do). Failing that, here’s a glimpse of the onscreen keyboard that DreamShell equips :

Learning to use it is a game in itself.
There is an option of installing DreamShell in the BIOS. I did not attempt this. I don’t know if it’s possible (not like there’s a lot of documentation)– perhaps a custom BIOS modchip is needed. But here’s what the screen looks like :

There is also a plain console to interact with (better have a physical keyboard). There are numerous file manipulation commands and custom system interaction commands. I see one interesting command called ‘addr’ that looks useful for dumping memory regions to a file.
A Lua language interpreter is also built in. I would love to play with this if I could ascertain whether DreamShell provided Dreamcast-specific APIs.
Tips And Troubleshooting
I have 3 Dreamcast consoles, affectionately named Terran, Protoss, and Zerg after the StarCraft II stickers with which they are adorned. Some seem to work better than others. Protoss seemed to be able to boot the DreamShell disc more reliably than the others. However, I was alarmed when it couldn’t boot one morning when it was churning the previous day.I think the problem is that it was just cold. That seemed to be the issue. I put in a normal GD-ROM and let it warm up on that disc for awhile and then DreamShell booted fine. So that’s my piece of cargo-culting troubleshooting advice.
-
Things I Have Learned About Emscripten
1er septembre 2015, par Multimedia Mike — Cirrus Retro3 years ago, I released my Game Music Appreciation project, a website with a ludicrously uninspired title which allowed users a relatively frictionless method to experience a range of specialized music files related to old video games. However, the site required use of a special Chrome plugin. Ever since that initial release, my #1 most requested feature has been for a pure JavaScript version of the music player.
“Impossible !” I exclaimed. “There’s no way JS could ever run fast enough to run these CPU emulators and audio synthesizers in real time, and allow for the visualization that I demand !” Well, I’m pleased to report that I have proved me wrong. I recently quietly launched a new site with what I hope is a catchier title, meant to evoke a cloud-based retro-music-as-a-service product : Cirrus Retro. Right now, it’s basically the same as the old site, but without the wonky Chrome-specific technology.
Along the way, I’ve learned a few things about using Emscripten that I thought might be useful to share with other people who wish to embark on a similar journey. This is geared more towards someone who has a stronger low-level background (such as C/C++) vs. high-level (like JavaScript).
General Goals
Do you want to cross-compile an entire desktop application, one that relies on an extensive GUI toolkit ? That might be difficult (though I believe there is a path for porting qt code directly with Emscripten). Your better wager might be to abstract out the core logic and processes of the program and then create a new web UI to access them.Do you want to compile a game that basically just paints stuff to a 2D canvas ? You’re in luck ! Emscripten has a porting path for SDL. Make a version of your C/C++ software that targets SDL (generally not a tall order) and then compile that with Emscripten.
Do you just want to cross-compile some functionality that lives in a library ? That’s what I’ve done with the Cirrus Retro project. For this, plan to compile the library into a JS file that exports some public functions that other, higher-level, native JS (i.e., JS written by a human and not a computer) will invoke.
Memory Levels
When porting C/C++ software to JavaScript using Emscripten, you have to think on 2 different levels. Or perhaps you need to force JavaScript into a low level C lens, especially if you want to write native JS code that will interact with Emscripten-compiled code. This often means somehow allocating chunks of memory via JS and passing them to the Emscripten-compiled functions. And you wouldn’t believe the type of gymnastics you need to execute to get native JS and Emscripten-compiled JS to cooperate.
“Emscripten : Pointers and Pointers” is the best (and, really, ONLY) explanation I could find for understanding the basic mechanics of this process, at least when I started this journey. However, there’s a mistake in the explanation that left me confused for a little while, and I’m at a loss to contact the author (doesn’t anyone post a simple email address anymore ?).
Per the best of my understanding, Emscripten allocates a large JS array and calls that the memory space that the compiled C/C++ code is allowed to operate in. A pointer in C/C++ code will just be an index into that mighty array. Really, that’s not too far off from how a low-level program process is supposed to view memory– as a flat array.
Eventually, I just learned to cargo-cult my way through the memory allocation process. Here’s the JS code for allocating an Emscripten-compatible byte buffer, taken from my test harness (more on that later) :
var musicBuffer = fs.readFileSync(testSpec[’filename’]) ;
var musicBufferBytes = new Uint8Array(musicBuffer) ;
var bytesMalloc = player._malloc(musicBufferBytes.length) ;
var bytes = new Uint8Array(player.HEAPU8.buffer, bytesMalloc, musicBufferBytes.length) ;
bytes.set(new Uint8Array(musicBufferBytes.buffer)) ;
So, read the array of bytes from some input source, create a Uint8Array from the bytes, use the Emscripten _malloc() function to allocate enough bytes from the Emscripten memory array for the input bytes, then create a new array… then copy the bytes…
You know what ? It’s late and I can’t remember how it works exactly, but it does. It has been a few months since I touched that code (been fighting with front-end website tech since then). You write that memory allocation code enough times and it begins to make sense, and then you hope you don’t have to write it too many more times.
Multithreading
You can’t port multithreaded code to JS via Emscripten. JavaScript has no notion of threads ! If you don’t understand the computer science behind this limitation, a more thorough explanation is beyond the scope of this post. But trust me, I’ve thought about it a lot. In fact, the official Emscripten literature states that you should be able to port most any C/C++ code as long as 1) none of the code is proprietary (i.e., all the raw source is available) ; and 2) there are no threads.Yes, I read about the experimental pthreads support added to Emscripten recently. Don’t get too excited ; that won’t be ready and widespread for a long time to come as it relies on a new browser API. In the meantime, figure out how to make your multithreaded C/C++ code run in a single thread if you want it to run in a browser.
Printing Facility
Eventually, getting software to work boils down to debugging, and the most primitive tool in many a programmer’s toolbox is the humble print statement. A print statement allows you to inspect a piece of a program’s state at key junctures. Eventually, when you try to cross-compile C/C++ code to JS using Emscripten, something is not going to work correctly in the generated JS “object code” and you need to understand what. You’ll be pleading for a method of just inspecting one variable deep in the original C/C++ code.I came up with this simple printf-workalike called emprintf() :
#ifndef EMPRINTF_H #define EMPRINTF_H
#include <stdio .h>
#include <stdarg .h>
#include <emscripten .h>#define MAX_MSG_LEN 1000
/* NOTE : Don’t pass format strings that contain single quote (’) or newline
* characters. */
static void emprintf(const char *format, ...)
char msg[MAX_MSG_LEN] ;
char consoleMsg[MAX_MSG_LEN + 16] ;
va_list args ;/* create the string */
va_start(args, format) ;
vsnprintf(msg, MAX_MSG_LEN, format, args) ;
va_end(args) ;/* wrap the string in a console.log(’’) statement */
snprintf(consoleMsg, MAX_MSG_LEN + 16, "console.log(’%s’)", msg) ;/* send the final string to the JavaScript console */
emscripten_run_script(consoleMsg) ;
#endif /* EMPRINTF_H */
Put it in a file called “emprint.h”. Include it into any C/C++ file where you need debugging visibility, use emprintf() as a replacement for printf() and the output will magically show up on the browser’s JavaScript debug console. Heed the comments and don’t put any single quotes or newlines in strings, and keep it under 1000 characters. I didn’t say it was perfect, but it has helped me a lot in my Emscripten adventures.
Optimization Levels
Remember to turn on optimization when compiling. I have empirically found that optimizing for size (-Os) leads to the best performance all around, in addition to having the smallest size. Just be sure to specify some optimization level. If you don’t, the default is -O0 which offers horrible performance when running in JS.Static Compression For HTTP Delivery
JavaScript code compresses pretty efficiently, even after it has been optimized for size using -Os. I routinely see compression ratios between 3.5:1 and 5:1 using gzip.Web servers in this day and age are supposed to be smart enough to detect when a requesting web browser can accept gzip-compressed data and do the compression on the fly. They’re even supposed to be smart enough to cache compressed output so the same content is not recompressed for each request. I would have to set up a series of tests to establish whether either of the foregoing assertions are correct and I can’t be bothered. Instead, I took it into my own hands. The trick is to pre-compress the JS files and then instruct the webserver to serve these files with a ‘Content-Type’ of ‘application/javascript’ and a ‘Content-Encoding’ of ‘gzip’.
- Compress your large Emscripten-build JS files with ‘gzip’ : ‘gzip compiled-code.js’
- Rename them from extension .js.gz to .jsgz
- Tell the webserver to deliver .jsgz files with the correct Content-Type and Content-Encoding headers
To do that last step with Apache, specify these lines :
AddType application/javascript jsgz
AddEncoding gzip jsgz
They belong in either a directory’s .htaccess file or in the sitewide configuration (/etc/apache2/mods-available/mime.conf works on my setup).
Build System and Build Time Optimization
Oh goodie, build systems ! I had a very specific manner in which I wanted to build my JS modules using Emscripten. Can I possibly coerce any of the many popular build systems to do this ? It has been a few months since I worked on this problem specifically but I seem to recall that the build systems I tried to used would freak out at the prospect of compiling stuff to a final binary target of .js.I had high hopes for Bazel, which Google released while I was developing Cirrus Retro. Surely, this is software that has been battle-tested in the harshest conditions of one of the most prominent software-developing companies in the world, needing to take into account the most bizarre corner cases and still build efficiently and correctly every time. And I have little doubt that it fulfills the order. Similarly, I’m confident that Google also has a team of no fewer than 100 or so people dedicated to developing and supporting the project within the organization. When you only have, at best, 1-2 hours per night to work on projects like this, you prefer not to fight with such cutting edge technology and after losing 2 or 3 nights trying to make a go of Bazel, I eventually put it aside.
I also tried to use Autotools. It failed horribly for me, mostly for my own carelessness and lack of early-project source control.
After that, it was strictly vanilla makefiles with no real dependency management. But you know what helps in these cases ? ccache ! Or at least, it would if it didn’t fail with Emscripten.
Quick tip : ccache has trouble with LLVM unless you set the CCACHE_CPP2 environment variable (e.g. : “export CCACHE_CPP2=1”). I don’t remember the specifics, but it magically fixes things. Then, the lazy build process becomes “make clean && make”.
Testing
If you have never used Node.js, testing Emscripten-compiled JS code might be a good opportunity to start. I was able to use Node.js to great effect for testing the individually-compiled music player modules, wiring up a series of invocations using Python for a broader test suite (wouldn’t want to go too deep down the JS rabbit hole, after all).Be advised that Node.js doesn’t enjoy the same kind of JIT optimizations that the browser engines leverage. Thus, in the case of time critical code like, say, an audio synthesis library, the code might not run in real time. But as long as it produces the correct bitwise waveform, that’s good enough for continuous integration.
Also, if you have largely been a low-level programmer for your whole career and are generally unfamiliar with the world of single-threaded, event-driven, callback-oriented programming, you might be in for a bit of a shock. When I wanted to learn how to read the contents of a file in Node.js, this is the first tutorial I found on the matter. I thought the code presented was a parody of bad coding style :
var fs = require("fs") ; var fileName = "foo.txt" ;fs.exists(fileName, function(exists)
if (exists)
fs.stat(fileName, function(error, stats)
fs.open(fileName, "r", function(error, fd)
var buffer = new Buffer(stats.size) ;fs.read(fd, buffer, 0, buffer.length, null, function(error, bytesRead, buffer)
var data = buffer.toString("utf8", 0, buffer.length) ;console.log(data) ;
fs.close(fd) ;
) ;
) ;
) ;
) ;Apparently, this kind of thing doesn’t raise an eyebrow in the JS world.
Now, I understand and respect the JS programming model. But this was seriously frustrating when I first encountered it because a simple script like the one I was trying to write just has an ordered list of tasks to complete. When it asks for bytes from a file, it really has nothing better to do than to wait for the answer.
Thankfully, it turns out that Node’s fs module includes synchronous versions of the various file access functions. So it’s all good.
Conclusion
I’m sure I missed or underexplained some things. But if other brave souls are interested in dipping their toes in the waters of Emscripten, I hope these tips will come in handy.The post Things I Have Learned About Emscripten first appeared on Breaking Eggs And Making Omelettes.